




November 1, 2026: We added a pre-install Wi-Fi checklist for outdoor light controllers, covering combined 2.4/5 GHz networks, homes with dozens of smart devices, mesh coverage near the roofline, and the order for pairing several controllers.
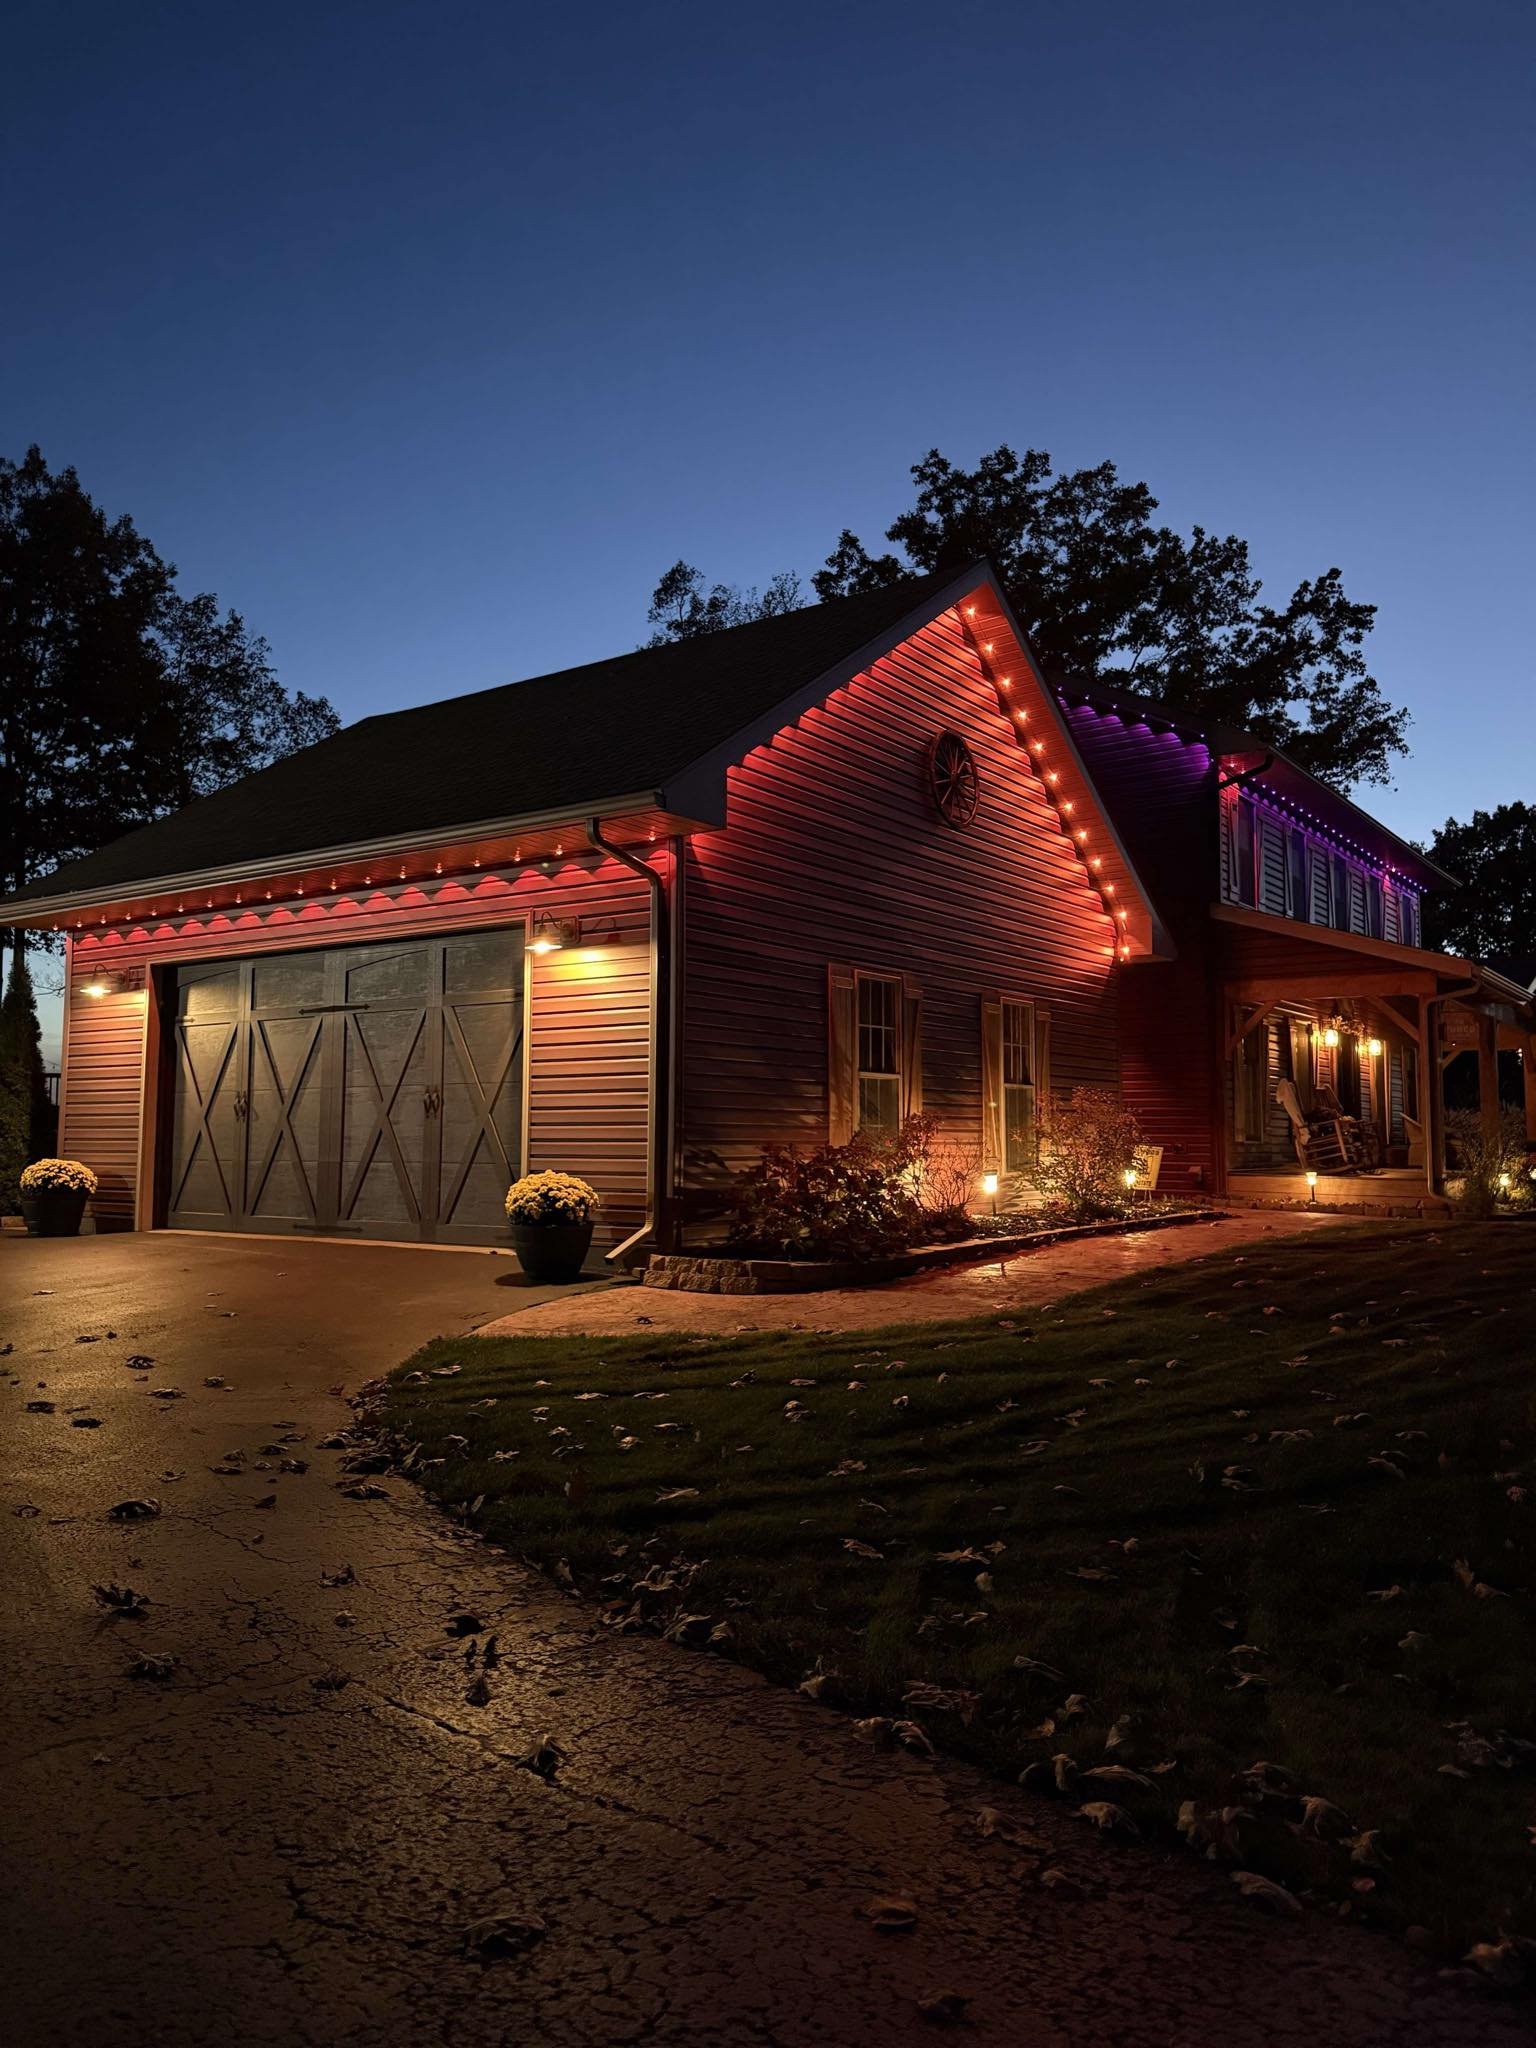
Govee Permanent Outdoor Light is a smart way to make the outside of your home more enjoyable, in a colorful and all-year-round way. This article provides a step-by-step guide on how to install permanent Christmas lights, making the process easy, professional, and suitable for your outdoor environment.
Part 1. Materials Needed for Permanent Christmas Light Installation
Before setting up the Govee Permanent Outdoor Lights, you will need the following: a ladder, a drill, a measuring tape, a pencil, mounting clips or screws, and, of course, the Govee light kit. The availability of such tools ensures the convenient and rapid installation.

How to pick the best permanent christmas lights >>
Part 2. How to Install Govee Permanent Outdoor Lights in 6 Steps
Pre‑Installation Preparation
Start by selecting the locations you want to illuminate, such as rooflines, patios, or fences. Ensure the surface is clean to ensure a safe stick or placement. Select the required length and have your power source ready. Then, recheck the layout one more time to ensure it is balanced and accessible, and place the real light there.
If your home already runs a lot of smart devices, go through the pre-install Wi-Fi checklist in Part 3 before you mount anything.
Here is the installation video for Govee Permanent Outdoor Lights Pro (H706A/B/C) :
For installation videos of other models, please check out the YouTube videos below >
- Govee Permanent Outdoor Lights 2 Pro (H3A51/3)
- Govee Permanent Outdoor Lights Prism (H707B/C)
Here is a step-by-step guide to help you install Govee permanent lights perfectly on your own.
Step1: After opening the box, the first thing to do is test the lights. To do so, connect the strings to examine whether they light up, and then connect them to a power source.

Step 2. After cleaning the wall with a cloth or tissue, please place the string lights 3 to 8 cm from the wall surface. (Most people choose a distance of 5–10 cm.)

Step 3: Hold the light firmly on the surface for at least five seconds after tearing the VHB gum from the rear of the light. To hold each string light in place, fasten it with four screw clips.


Step 4: Connect two string lights via water proof connectors and screw in the cap.

Step 5: If you want to install the H706C. 200ft/12 strings of lights, connect the LED driver module to the end of the fifth string light, followed by the remaining seven string lights. To ensure every string light functions correctly, plug it into the power source now.

Step 6: Screw the last string’s light section waterproof connecting cap firmly in place.


Guide: How to Cut, Splice or Extend Govee Permanent Outdoor Lights?
Part 3. Smart Setup & Configuration for Permanent Lights
Watch the user video for unboxing and installing the Govee Permanent Lights:
After you have physically set up your Govee Permanent Outdoor Lights, you must then perform some technical tasks with the help of your smartphone.
1. Connecting Lights to the Govee Home app
Launch the Govee Home app and tap the plus sign to add a button, then select your type of light (e.g., H706C for Govee Permanent Outdoor Lights Pro). Turn on Bluetooth on your phone. The app will automatically detect the lights, confirm, and pair. Once it is connected, you can then connect the device to a 2.4 GHz Wi-Fi network (not 5 GHz).
2. Adjusting Some Settings
After connecting, you'll find a wide selection of preset scenes to choose from, such as holiday lights ready for a party or dim daytime lights. You can also program light schedules to turn on or off at sunset, sunrise, or at a specific time of day.
Comes with Alexa or Google Assistant, enabling voice commands. Simply tell Alexa to turn on the outside lights, or instruct Google to set the patio lights to blue.
3. Music Sync
One can also sync the lights to music using the built-in mic of the Govee or the mic on your phone, making these lights particularly useful when you want to party or relax. Launch the app and turn on Music Mode. Listen to your lights pulse to the beat of your favorite song.
4. Outdoor Wi‑Fi Connectivity Tips
- Ensure that your router is positioned within 30 feet of the control box.
- Do not wall it up in thick walls or metal siding.
- The outdoor signals can be amplified with the assistance of a Wi-Fi range extender.
- Update the app's firmware to enhance its efficiency.
All this is in place, and you have an intelligent and flexible outdoor light system to be proud of.
5. Pre-Install Wi-Fi Checklist for Outdoor Light Controllers
Before installing outdoor Christmas light controllers, verify your 2.4 GHz band, network name, encryption, room for more devices, and outdoor power supply. Govee Permanent Outdoor Lights Pro is better suited for homes that already run dozens of smart devices, since it connects via 2.4 GHz Wi-Fi plus Bluetooth, works with Matter, Alexa, and Google Assistant, and comes in 100 ft, 150 ft, and 200 ft kits. Review the checklist below first.
Run these checks in order before you climb the ladder.
| Check | What to look for | If it fails |
| 1. 2.4 GHz band | 2.4 GHz is turned on in your router or mesh app. Govee Permanent Outdoor Lights Pro uses 2.4 GHz Wi-Fi plus Bluetooth, not 5 GHz | Turn the 2.4 GHz band back on; keep 5 GHz on for phones and laptops |
| 2. One combined network name | Your router shows one combined SSID (your Wi-Fi network name) for 2.4 and 5 GHz, often called band steering (a router feature that moves devices between 2.4 GHz and 5 GHz automatically) or Smart Connect | If the app can't finish setup, pause band steering, pair, then turn it back on. Or give 2.4 GHz its own network name for the lights and keep that name, since the lights stay on the network name they were paired with |
| 3. Security mode | WPA2-Personal (AES) or WPA2/WPA3 mixed mode | Avoid WPA3-only during setup; never turn security off to pair a device |
| 4. Room for more devices | Your router or mesh app has headroom in its device list and IP address (DHCP) pool | Remove devices you no longer use, or widen the DHCP range |
| 5. Signal at the control box | A steady 2.4 GHz signal at the exact spot under the eaves, tested with doors closed | Move a mesh node closer while keeping a strong link to the main router, use a wired connection for that node, or add an access point |
| 6. Same network, no isolation | Your phone and the lights are on the same network, not a guest network that blocks local devices | Move the lights off the guest network, or allow devices on it to talk to each other |
| 7. Outdoor power | A GFCI (ground-fault circuit interrupter, an outlet that cuts power when it detects a fault) -protected outlet and a control box rated for outdoor use. Govee Permanent Outdoor Lights Pro has an IP65 control box, and its power adapter is for indoor use only | Plug the adapter into an indoor outlet, such as one in the garage, and keep outdoor connections covered and off the ground |
| 8. Pairing plan | One controller at a time, each named by location (for example, Front Roofline) | Restart your router once and confirm the first set reconnects before you pair the next |
How to Handle One Combined 2.4/5 GHz Network
If your router puts 2.4 GHz and 5 GHz on one combined SSID, band steering can get in the way when you pair 2.4 GHz smart home devices, so check your WPA2/WPA3 setting and try the controller setup once before you change anything. Govee Permanent Outdoor Lights Pro uses 2.4 GHz Wi-Fi and Bluetooth. The app uses Bluetooth to find the control box first, and then connects to Wi‑Fi. For the steps, see Connecting Lights to the Govee Home app above.
If the lights will not pair, follow these steps:
- 1. Make sure your phone is connected to your home network and your VPN is off.
- 2. In your router app, pause band steering for a few minutes. Once the lights are paired, turn it back on.
- 3. Give the 2.4 GHz band a separate network name just for the lights and keep that name permanently, because if you change it later, the control box will disconnect.
- 4. Change only one router setting at a time so you know what worked.
- 5. If you already set the lights up through Matter, do not use the Govee Home app to switch networks, or the Matter connection will break, and you will have to reset and configure everything.
What to Check When You Already Have Dozens of Smart Devices
Having plenty of smart gear around the house does not mean you have to buy a new router. Start by checking how many devices actually use Wi-Fi. Anything running on Zigbee, Thread, or Bluetooth does not take up your router's wireless slots. Then open your router or mesh app to see if you still have room in your connected device list and your DHCP address pool.
In your 2.4 GHz settings, set the channel width to 20 MHz and pick the clearest channel out of channels 1, 6, or 11. Make sure your network uses at least WPA2 encryption, such as WPA2-Personal (AES) or WPA2/WPA3 mixed mode. Never turn encryption off just to get a device connected.
Putting your gear on a separate IoT network is optional. Avoid standard guest networks because they usually block local communication between the phone and lights. Keep in mind that every light controller you add counts as another 2.4 GHz device on your network.
Mesh Wi-Fi Coverage Near the Roofline
Go to the exact spot where you want to install the control box, and measure the signal strength. Test right there, not by a window or upstairs. The Wi-Fi bars on your phone only give you a rough idea. Check the Wi-Fi signal strength (RSSI) your mesh app reports for the outdoor controller spot on the 2.4 GHz band. RSSI is shown in dBm, and a number closer to zero means a stronger signal.
If the signal out there is weak, try the following fixes:
- 1. Check your mesh app and see which node covers the side of the house where the control box will go. Make sure it has a strong connection to your main router.
- 2. Move that node closer to that side, but keep it somewhere it can have a stable connection to the main router and keep it out of dead spots.
- 3. If possible, connect that node using an Ethernet cable for a wired backhaul.
- 4. If coverage still doesn't improve, install an outdoor access point, install an outdoor access point.
Materials like brick, metal siding, aluminum gutters, and foil insulation can affect the signal and Wi-Fi range. It’s better to keep your windows and exterior doors shut while testing.
For electrical safety, plug outdoor holiday lights into a GFCI outlet and use only weatherproof extension cords rated for outdoor use. The cords you are using should be certified for outdoor use, and if your outdoor outlet lacks built-in protection, pick up portable outdoor GFCIs.
Keep in mind that an outdoor-rated light does not mean its power supply is also outdoor-rated. Govee Permanent Outdoor Lights Pro comes with an IP65 control box, but its adapter is for indoor use only, so it must be plugged into an indoor outlet. If your only outlet by the roofline sits outside, Govee Permanent Outdoor Lights 2 Pro (control box and power adapter IP67) or Govee Permanent Outdoor Lights Prism (power adapter marked Outdoor Use) fits that setup.
Pairing Order for 1–10 Light Controllers
Adding up to ten controllers will not overload a normal home network. Most problems come from a weak signal or a pairing step that went wrong. It’s better to set up controllers one by one.
- 1. Matter setup first: If you want to use Matter, pair the lights in your Matter app within 15 minutes of plugging them in, before opening the Govee Home app. As noted in the Govee Matter FAQ, Govee runs Matter over Wi-Fi, so your phone and Matter hub must be connected to a 2.4 GHz network with IPv6 turned on in your router.
- 2. Bench test: Plug the first set in near your router to test colors, dimming, and a basic automation like a sunset schedule.
- 3. Name by location: Give each controller a clear name, like Front Roofline or Garage Eaves.
- 4. Reboot check: Restart your router once to make sure the first controller reconnects on its own before you start on the next one.
- 5. Voice check: Once everything is up, connect your lights to Alexa or Google Assistant and run a quick voice test.
If you have a wide roofline, a single Pro kit can be cut and extended up to 200 ft in total. If you go beyond 150 ft, you will need a Govee driver module, which comes included in the 200 ft box.
Wi-Fi Light Controllers vs Smart Plugs vs Hub-Based Controllers
Knowing the difference between control setups will save you headaches when planning outdoor lighting.
Wi‑fi light controllers: App-controlled permanent lights with their own control boxes let you pick custom colors, scenes, and set schedules in the app, but each controller takes up a 2.4 GHz client spot and needs a dependable signal out at the eaves.
Standard string lights + Wi-Fi smart plug: Putting standard string lights on an outdoor Wi-Fi smart plug lets you turn power on and off on a timer, but you cannot change colors or run animations, and the plug still uses a 2.4 GHz slot.
Hub-based controllers (Zigbee or Thread): Hub-based controllers using Zigbee or Thread do not take up a Wi-Fi client slot on your router, but you need a compatible hub indoors, and its wireless range has to reach the eaves.
The Matter standard helps different brands work together under one roof. Because Govee uses Wi-Fi for Matter, these lights still connect over your 2.4 GHz band. If your house already has a lot of smart devices and you want color-changing lights, go through the checklist above before picking Wi-Fi lights.
Why Govee Permanent Outdoor Lights Pro Fits a Busy Smart Home
Govee Permanent Outdoor Lights Pro is better suited for homeowners who already run dozens of smart devices and want 100 ft, 150 ft, or 200 ft of roofline lights that join their Matter, Alexa, or Google Assistant setup.
Pros:
- Uses 2.4 GHz Wi-Fi plus Bluetooth for setup and works with Matter, Alexa, and Google Assistant, so it joins your existing smart home.
- You can pick from 100 ft, 150 ft, or 200 ft kits. You can cut and extend a run up to 200 ft, and the 200 ft kit comes with the driver module you need once you pass 150 ft.
- The 200 ft setup has 120 lights putting out 50 lumens each, with warm to cool white (2,700K to 6,500K) for daily and security lighting, and it pairs with the Govee Outdoor Motion Sensor.
Cons:
- It connects only to 2.4 GHz Wi-Fi, not 5 GHz, so each controller adds to your 2.4 GHz count, and you need Bluetooth on to set it up.
- The lights handle temperatures from -4°F to 140°F and the control box is IP65 rated, but the power adapter is indoor-only, meaning it needs an indoor outlet. Also, the upgraded black H706C does not work with the older H706C or with current voltage booster modules and control boxes. Pricing is $439.99 for 100 ft, $599.99 for 150 ft, and $759.99 for 200 ft as of November 1. Measure your eaves before you choose a length.
Before climbing the ladder, run through the checklist above. Mount the control box under the eaves, and plug the power adapter into an indoor outlet.
See lengths and housing colors on the Govee Permanent Outdoor Lights Pro product page.
Always follow the product manual and local electrical codes. For hardwired installations, hire a licensed electrician.
Part 4. Govee Permanent Outdoor Lights Installation Tips and Troubleshooting Guide
Here are some Govee’s permanent outdoor lights installation robust tips and fixes to overcome some common issues :
Installation Tips
1. Begin at the source of power
You should always start your installations nearest to your power point and then proceed towards the outer side. This decreases slack on the cables and maintains continuity in the strip.
2. Apply Adhesive and Screws
The strips may be supplied with adhesive pads, which are very strong; however, it is also recommended to use the screws and clips provided, particularly where the strips are exposed to wind, moisture, or heat.
3. Sharp Bends
Always avoid making the light strips make sharp turns or travel around rough edges. This can break the wiring and cause performance issues.
4. Symmetry Level
Place both pucks horizontally with the aid of a level tool. The crooked lines may be visible at night, which reduces the professional appearance.
Troubleshooting Common Problems
1. LEDs not Lighting up
Check all connectors to ensure they are securely fastened and sealed with waterproof caps. A loose or misplaced pin can break the circuit.
2. Wi-Fi not Connecting
Ensure you are using a 2.4 GHz network. Reset your router or bring it near. If you're experiencing a weak signal, consider using a Wi-Fi extender.
3. Lights not Connecting to the App
During the initial pairing, ensure that Bluetooth is activated. Reset the application or upgrade it when the command is slow.
4. Adhesive Failure
Clean the surfaces well with alcohol, then apply the adhesive. When strips fall, adhesive pads should be replaced and screws should be used as backup.
These tips should help keep your Govee smart lights bright, networked, and securely fastened over the years.
Part 5. FAQs about Permanent Outdoor Lights Installation
Q1. How to Connect to Govee Permanent Outdoor Lights?
You need to install the Govee Home app on your phone. Switch on its Bluetooth and connect the control box. Select the type of Govee light that you have, and tap the + button in the app to add a new device. After connecting to Bluetooth, follow the prompt to connect to a 2.4GHz Wi-Fi network.
Q2. How Long Does It Take to Install Govee Permanent Outdoor Lights?
Installation on most homes takes between 2 and 4 hours, depending on the length of the lights and the surface to be mounted. The layout may be planned, and the elements can be tested, which will significantly simplify the entire process.
Q3. Do You Need WiFi for Govee Permanent Outdoor Lights?
Yes, it must have Wi-Fi to access remotely, use voice commands, and utilize innovative features such as scheduling and scene configuration. It is essential to ensure that you are using a 2.4GHz network, as 5GHz is not supported.
Q4. Is It Easy to Install Govee Permanent Outdoor Lights?
Yes--it is easy to install. Govee supplies elaborate guides, adhesive clips, and waterproof adapters. Most users can complete the task without calling a professional, as it requires only simple tools, such as a drill, ladder, and measuring tape.
Q5. How to Secure Govee Outdoor Lights?
Fix the lights with the mounting clips and screws provided. Begin on the control box and insert clips every 12-18 inches to provide support. To further make it more durable, place waterproof adhesive pads (supplied) and screw the clips into position.
Q6. How to Reset Govee Permanent Outdoor Lights?
Hold the button on the control box with your fingers until the light strip flashes or the indicator changes, approximately 10 seconds. Alternatively, a soft reset can be performed by powering off the device and then powering it back on within 10 seconds.
Q7. How Much Does It Cost to Install Permanent Christmas Lights?
If you need to hire someone to help you install them, the average installation cost for permanent Christmas lights is around $300 to $500.
Q8. How Long Do Permanent Christmas Lights Last
High-quality lights, such as those sold by Govee, are durable and long-lasting. Given that they are installed and properly cared for, they may last up to 50,000 hours, or over 10 years of everyday use. They are designed to be weatherproof and therefore last throughout the year.
Explore Govee Christmas Lights >>
Q9. Where to Install Govee Permanent Outdoor Lights
Fix them along roof lines, soffits, fences, decks, and outdoor trims, anywhere you desire light. They should be best placed under eaves, 5-10 cm away from the wall, so that they can create a balanced wash effect. Ensure you are near a power source and have a strong Wi-Fi signal.
Q10. Can I install Permanent Christmas Lights Myself?
Yes, Govee Permanent outdoor lights come in a DIY type. Most homeowners can install them with simple tools, such as a drill, ladder, and measuring tape, since it does not require the use of professional assistance. You only have to read the instructions, make connections, and observe safety measures, particularly when climbing ladders or roof tops.
Q11. What Is the Best Distance from the Wall for Installing Permanent Outdoor Lights?
Based on user reviews on Reddit, Govee lights should be positioned approximately 5-10 cm away from the wall to create the most attractive look. It provides a clean, scalloped pattern of lighting and the proper level of illumination, without excessive glare, thereby making your installation both fashionable and efficient.
Conclusion
Govee Permanent Outdoor Lights are an intelligent, fashionable upgrade, combining utility, design, and innovative technology. A professional look can be easily achieved with the right tools, precise planning, and the integration of apps. Are you going to renovate the exterior of your house? Experience Govee permanent lights today and get the best of brilliance all year round at your fingertips.


