


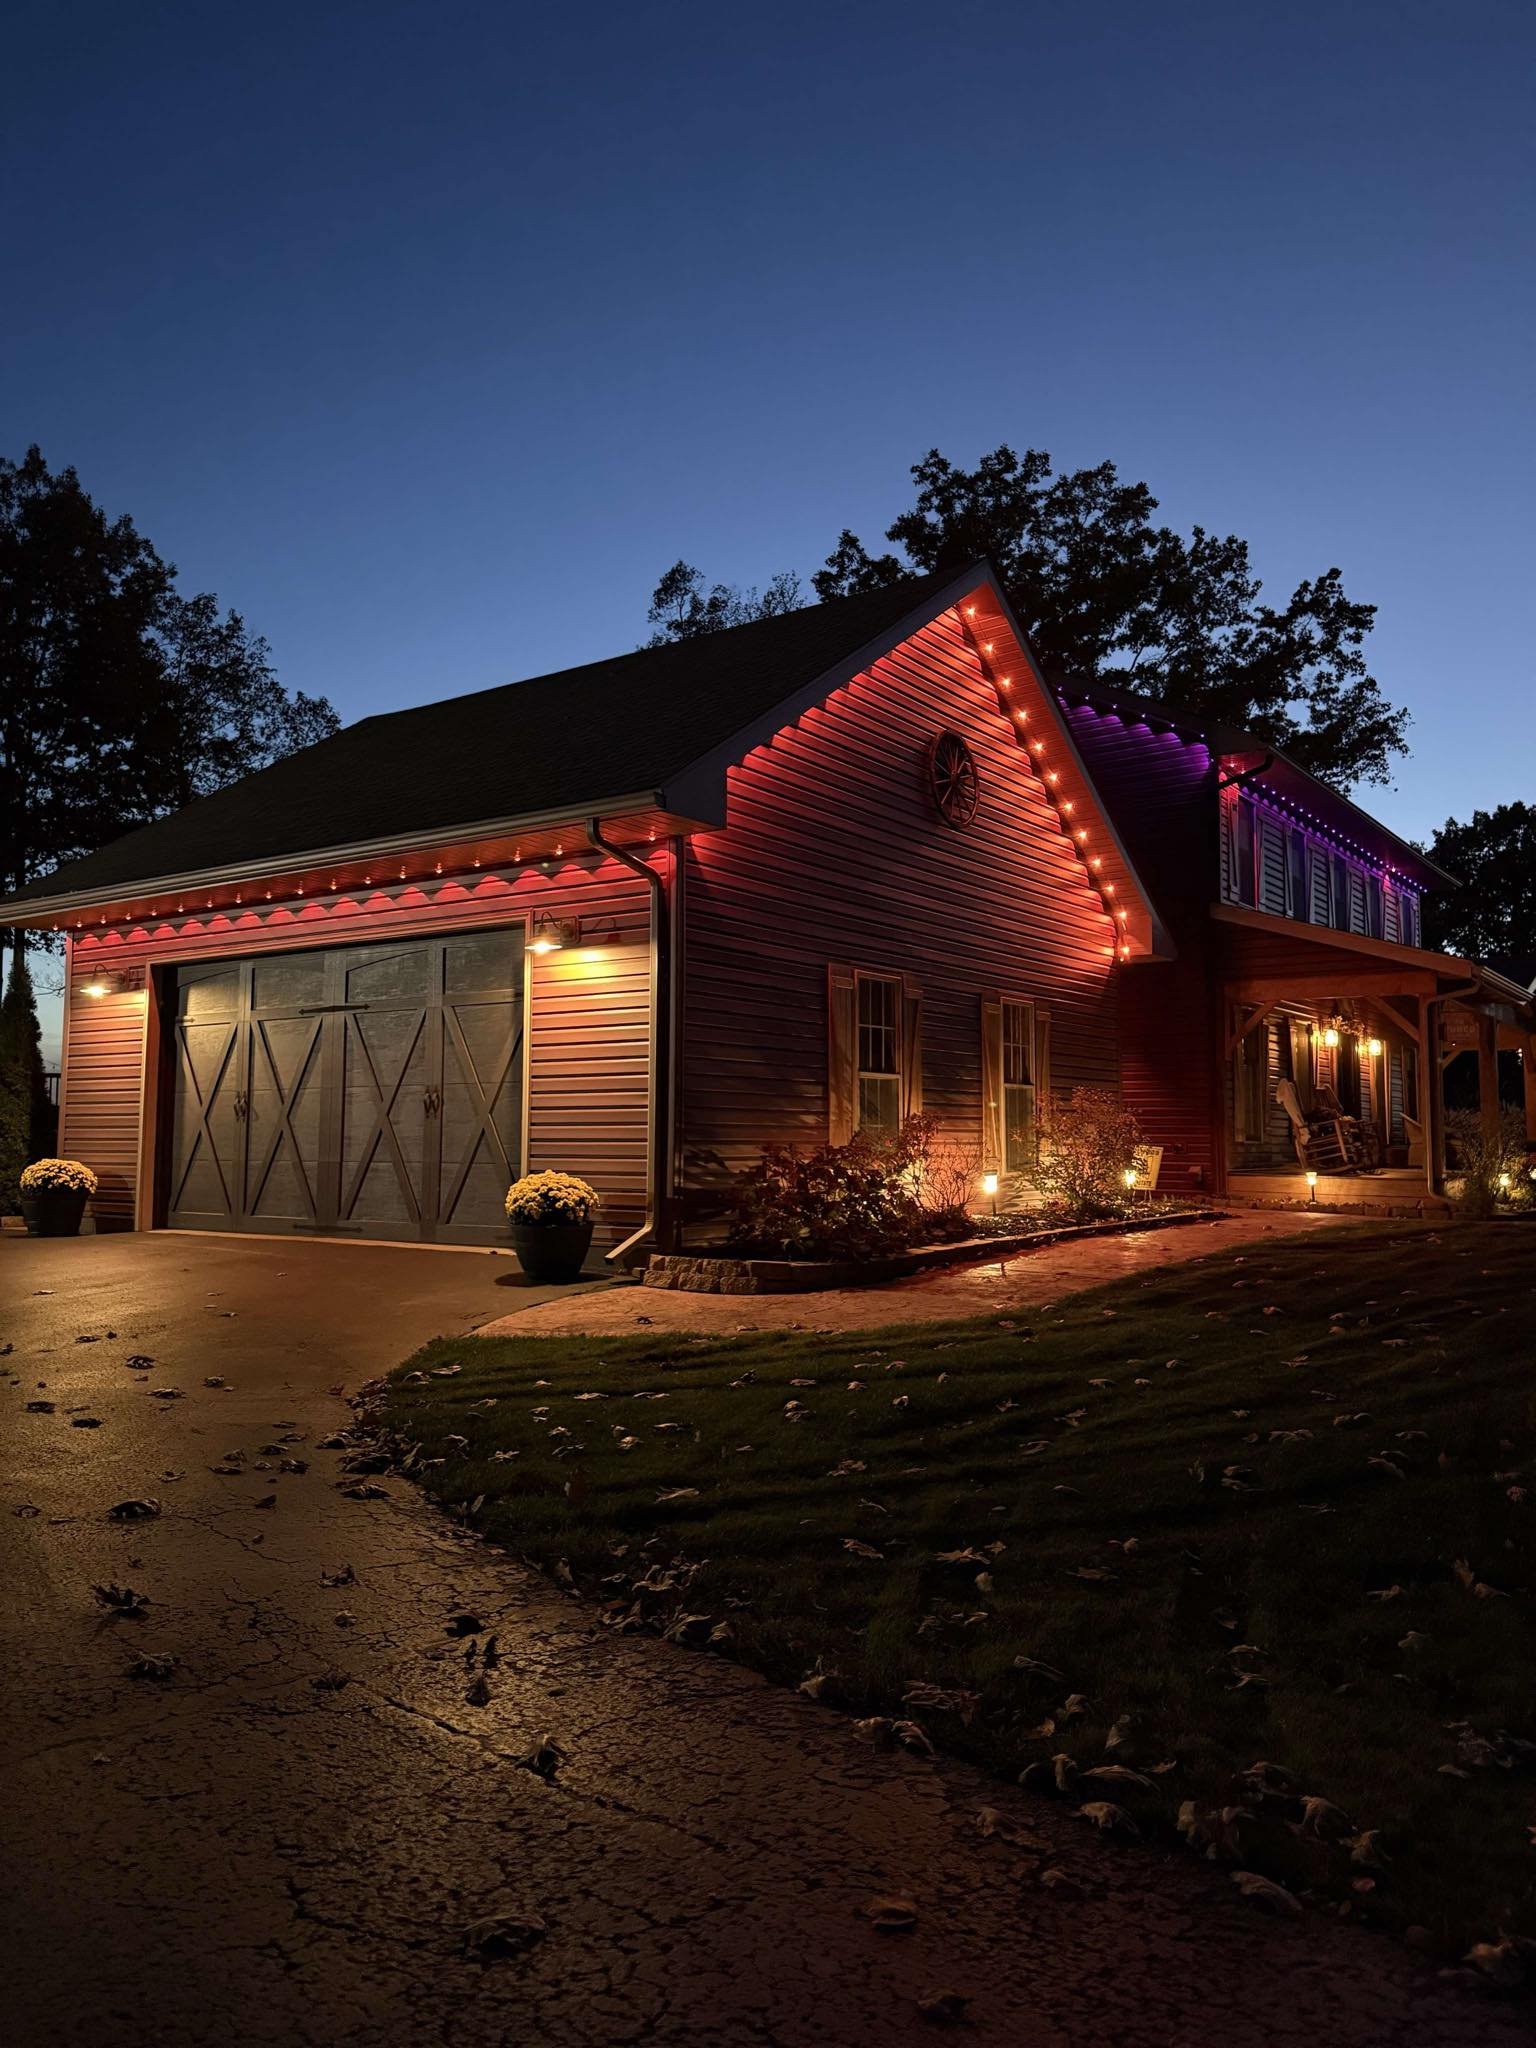


Patios and backyards bring real charm to your entire living space, so it actually matters how you decorate your outdoor area. And what’s better than aesthetics meeting function? Light up your space efficiently with the right kind of lighting using this guide. Part 1: What You'll Need for String Light Installation There are only a few things that you will need for hanging patio string lights, which will make the installation process easier and faster. Outdoor String Lights Measuring tape Pencil to mark mounting points Ladder or stool Mounting hooks, clips, or adhesive-backed mounts Drill or hammer Outdoor-rated extension cord Zip ties Cable clips Outdoor power outlet Explore and Shop all Smart Outdoor String Lights > Part 2: Planning Your Outdoor String Lights Layout There is a variety of layouts to choose from, depending on your mood and the dimensions of your outdoor space. Zigzag Layout This is perfect for larger areas. It provides full overhead coverage by creating a W- or Z-shape with a single long strand of string lights that go back and forth. X Pattern Layout Two diagonal stands make an X shape and create a beautiful focal point in the center of a square or rectangular area. It is also called a diamond-shaped layout. Perimeter Layout It is best used to create a clean and soft ambiance. The string lights are lined around the entire border of the space, neatly tucked into the edges. Starburst Layout This layout is usually used for events for a more dramatic effect. A star shape is created by extending light strands from a central point. Pergola Layout As the name suggests, this setting is used along pergola beams according to its dimensions. It creates a more festive ambiance. Part 3: Calculate How Many String Lights You Need There’s a simple formula to get the right number of string lights installed in your patio or backyard. Use a measuring tape to measure the area and the length of the strands. It’s always better to consider slack for curves and corners. Area Suggested Length 10×10 ft patio 48 ft 12×12 ft patio 50-60 ft 20×20 ft patio 100-120 ft 30×30 ft backyard 150-200 ft Part 4: How to Hang Outdoor String Lights in 5 Steps Use case by @Hammertime7(Govee community) Step 1: Plan Your Layout Pattern Decide which vibe you will go for according to the occasion or your outdoor space, and then choose your layout pattern. Then, simply mark where your anchors or hooks will be installed with a pencil to create your chosen pattern. Step 2: Measure and Test First Measure the total distance to be covered by the string lights and then plug in the lights first to check if they all work fine before the installation process. Step 3: Install the Hooks or Anchors Now, screw in the hooks or anchors on the marked points. Make sure that each anchor point is strong enough to hold the lights and doesn’t snag at any point. Step 4: Hang the Outdoor String Lights Follow the pattern and start hanging the lights slowly. Avoid pulling or tugging on the strands. Make sure the string lights are not too tightly wrapped around the corners. Step 5: Clip and Adjust In the end, use the zip ties or clips to secure the lights and give it a neat look. Make adjustments, then finally turn on the lights for the final look testing. Part 5: Hanging String Lights in Different Spaces Scenario 1: How to Hang String Lights on a Covered Patio or Pergola Use case by @CyberLights (Govee community) A covered patio or pergola is a stable structure, and so it can easily be decorated with lights without needing too many support products or anchors. Firstly, inspect the beams for strength and support. Then measure the area and plan your layout. Mark the positions of anchors and then proceed to install screw-in hooks or clips into the structure. Carefully follow the layout pattern and then secure it all with zip ties in the end. Scenario 2: How to Hang Outdoor String Lights Without Trees Use case by @The Lighting Addict 🇨🇦 There are many other stable support options if your backyard doesn't have any trees. You can use fence posts, poles, or even wall-mounted hooks to light up your outdoor space. Measure the area you want to set up the lights around, and then choose your layout. Install the most convenient support options in a way that they hold the lights evenly. Then attach the outdoor-rated hooks to each support. The next step is to start draping the lights carefully along the path, starting from the power source. Use the zip ties to secure any loose ends. Scenario 3: How to Hang Outdoor String Lights without Nails There are various other options to anchor your outdoor string lights without drilling nails. These include: Tension wire setup Suction cup hooks Fence clips Gutter clips Adhesive outdoor hooks Zip ties Part 6: How to Hang Outdoor String Lights on Different Surfaces Surfaces Methods Brick Walls You can use drill-in screw hooks with anchors for a strong hold into the brick. Concrete Walls Concrete anchors and screws or heavy-duty adhesive outdoor-rated hooks can be used to hold on to the wall firmly. Stucco Walls Use special stucco hooks or adhesive clips that are especially designed for textured surfaces. Vinyl Siding Vinyl siding hooks are available that slide under panels without drilling. Wood Structures Cup hooks are usually used on wooden surfaces for that strong grip and faster installation. Metal Fences Metal fence clips and magnetic hooks are widely used for quick and reliable installation. Part 7: How to Hang Govee String Lights and Connect Them to the App Step 1: Connect the string lights and control box to the adapter. Step 2: Power them on to check if the lights are working properly. Step 3: Use the zip ties to secure the string lights to your selected position. Step 4: You can also use the cable clips to keep the wires secured vertically. Step 6: Power up your light bars and then connect your phone to the 2.4GHz Wi-Fi network. Open the Govee home app, tap the + sign, and search string light's model in the search bar. Step 7: Input your WiFi name and password correctly. Turn on your location and short-press the start/cancel button to pair the device. The string lights are now connected to the Govee app on your phone. Photo by @QualiZZ (Govee community) Part 8: Where to Hang Outdoor String Lights Once you choose a suitable location to display outdoor string lights, it not only adds beauty but also adds utility. These are some of the creative and sunny places where you may hang your lights like a pro: 1. Around the Backyard or Deck 2. Wrapped Around Trees 3. Along the Fences or Railings 4. Above the Patio or Deck Dining Area 5. Along Walkways, or Garden Paths 6. Summer Camp 7. Around Pool Areas Read more: 25 Creative Patio String Lights Ideas Part 9: Pro Tips for Weatherproofing and Safety Photo by @Trizle (Govee community) Always use outdoor-rated lights against rain, wind, and humidity. Waterproof caps are used to seal all connections to prevent water damage. Avoid overloading sockets. Use outdoor extension cords in your backyard that are also outdoor-rated. Keep all the plugs elevated and off the ground. Use sufficient zip ties to secure loose cables. Check for frayed wires or cracked bulbs for overtime damage. Always leave 2 to 3 inches of slack per span since wires can expand and shrink with changing temperatures. Turn off lights during extreme weather conditions for safety. Use GFCI outlets to reduce the risk of electric shock outdoors. Hang the string lights at a safe height to avoid any tripping. FAQs about Hanging String Lights 1. How far apart should string light poles be? String light poles should be spaced anywhere between 15 and 25 feet apart. You should reduce spacing to around 10 feet for heavier commercial-style lights to give better support and prevent any damage. 2. What is the ideal height for string lights? The ideal height for hanging string lights is usually 7 to 10 feet above the ground. This height provides a warm, even glow in your backyard and prevents any tripping hazards. You may choose to hang the lights lower if there is a seating setup to warm up the ambiance even more. 3. How do I install string lights on my roof or gutters? Gutter clips are the best for this situation. You can also use adhesive outdoor hooks. Avoid drilling into roofing material. 4. Can outdoor string lights stay up all year? Yes, most outdoor-rated lights can stay up all year. But you must check them seasonally for any damage, especially after harsh weather conditions. 5. Do outdoor string lights need a guide wire? Yes. A steel guide wire gives strength and reduces extra strain on the bulbs. It is best to attach lights to the wire using some zip ties or light clips for a secure and neat look. 6. How to hang string lights on a fence? You can use fence clips or zip ties to put the lights directly on the fence panels. Place them evenly for a clean look and don’t pull the wire too tightly to avoid damage. Conclusion This was the simplest guide to hang outdoor string lights. It is a piece of cake if you follow the steps. Bring that warm glow to your dark outdoor space and invite all your friends and family over to vibe with you! Your smart choices not only make your life easier but also fill up your space with warmth and love. Just double-check everything for safety and switch on the fun for everyone.
6/23/2026
Looking for ideas to light your landscape, specifically your driveway? Rightfully so, because the driveway lighting generates an essential first impression! There are plenty of outdoor lighting fixtures, including driveway post lights and bollards. Lighting your driveway is also important for safety and makes your home more welcoming. Top 18 Driveway Lighting Ideas 1. Driveway Post Lights Modern post lights usually have minimal detailing. Lantern lights like these from Govee have that classic style but are transformed to suit modern aesthetics, especially with their stunning design. They further define the exterior’s style while complementing your home’s architecture. Even one of these in your driveway can create a statement! 2. Classic Path Lights Back to the classics: those good ole pathway lights (here’s Govee’s option) dug into the soil. We love these because they offer a wide lighting coverage. So each light can cover an area of over one squared meter! Their sleek LED design also adds a modern look to your driveway. 3. Recessed Driveway Lights Credit: Light Up Nashville These are for your runway moment! Recessed lights are typically installed directly into the driveway surface. These then create a clean and architectural glow. We love the high-end feeling it creates! If your home has a modern exterior, recessed driveway lights are your best bet. 4. Driveway LED Strip Lights Outdoor strip lights, like Govee RGBIC Outdoor Neon Rope Lights, can guide your path on the driveway. This allows visitors to be guided to the front door without tripping or any safety risks. Plus, they highlight your driveway like it’s a decorative element! 5. Driveway Solar Powered Lights If you like to stay on top of your energy consumption, harnessing the power of the sun is deffo your best bet. That’s where driveway solar-powered lights step in. These will light the space up, but will also save you energy. So you’re cutting on electricity bills while serving the purpose. 6. LED Paver Lights Credit: Lumengy These are built right into your pavers or concrete blocks. The result is a grid-like glow. It feels intentional and modern. If you go for paver lights, you can expect a subtle look during the day, which appears impressive at night. Durable options are also waterproof, so there’s no hassle installing them right into your driveway. 7. Spotlights Spotlights in the interior are often used as “accent lighting”, that is, to highlight the architectural features in your home. Similarly, spotlights lining your driveway can bring focus to this part of your exterior, including the decorative elements along the path. Govee Outdoor Spotlights come in a variety of colors you can shift around. 8. Ground Lights A subtler version of spotlights are ground lights. These guide the pathway in a similar fashion, but without directing light on any particular elements. Instead, they’re flush-mounted with a more lowkey presence. The Govee Outdoor Ground Lights 2 are a stunning, colorful option! And, don’t worry, they’re durable enough to be driven over. 9. Under-Driveway Wall Wash Lighting Credit: Home Building If your driveway runs alongside a wall, this is where things get interesting. Instead of leaving that surface in the dark, use a soft wall wash. Slim fixtures placed at the base of the wall cast an even layer of light upward. We love the effect this creates: the whole space feels high-end without relying on obvious fixtures. 10. Farmhouse Sconces Credit: Clopay Door Some driveways culminate in a garage. For such spaces, outdoor wall sconces flanking the door are a good option. We especially love farmhouse-style fixtures that can provide plenty of light to park your car. That said, you want to relate your exterior lighting style to your home’s architecture. 11. Driveway Tree Uplighting Credit: Tru Scapes If your driveway is lined with trees, uplighting changes everything! Specifically, it adds height and drama at night. Suddenly your driveway feels like a proper “entrance” to your space. This is especially a great idea if you love that whimsical feeling in the exterior of your home. 12. Fence Lighting Don’t let your fence disappear at night! A simple line of lighting along the fence can define the entire driveway. You can mount slim fixtures on the posts or add subtle strip lighting along the length. This will feel like you’re outlining the space. It also helps with visibility without flooding the area with harsh light. 13. Step Lights (for Sloped Driveways) Credit: Washington Outdoor Lighting If your driveway is slightly raised, take the opportunity to utilize step lights. Low-profile step lights along edges or retaining walls add safety (so visitors can watch their step) and structure. They also help visually “frame” the space. 14. Motion Sensor Lights Credit: Washington Outdoor Lighting Not the bulky kind! Today’s motion lights are sleek and subtle. They stay quiet until needed, then softly illuminate as someone arrives. The good part here is that you are again saving energy, as the lights will switch on only when there’s movement (and it’s needed). 15. Movable Lighting Credit: Diffusion Shop This one’s versatile. Outdoor floor lamps are great for a back deck or your entertaining spaces. But you can also use them to line your driveway! Such fixtures are flexible, so that you can move them around depending on the day and your needs. 16. Bollards If you’re looking to create an architectural feel, go for angular bollards. These can cast light exactly where you need it. You can mount bollards to a stone wall or other border(s) of your driveway. 17. Reflective Lighting with Water Features Credit: Homes and Gardens If your driveway sits near a water feature (like a mountain), lighting it creates reflection. That soft shimmer instantly makes the space feel more high-end and layered. And you’re still bringing light to a space near your driveway! 18. Layered Approach Credit: Home Building We saved the layering for the last. Go ahead and combine your lights. For example, modern path lights leading upto your front door, with outdoor wall sconces flanking a grand entrance door. This approach makes sure you’re lighting the pathway and then the destination, creating the perfect first impression of your home! Design Tips: How to Light a Driveway? Photo from: DonnyB Before making any design decisions, you want to observe the driveway in natural light: symmetry, trees, proportions, etc. are all elements that must interact harmoniously with artificial light. Think about the temperature of your light fixtures. Cool light (anything above 5000K) isn’t ideal for driveways, because it makes the space feel rigid—something more suited to an industrial environment. Instead, in residential spaces, go for warm lighting in the range 2700K to 3000K. When installing the fixtures, place low-voltage, downward-facing lights along the edges of the driveway. This helps clearly define the path without producing glare. From a design perspective, layer your lighting. Combine pathway lights with accents on nearby trees or fences to create a warm and inviting atmosphere. Also, pay attention to the spacing of your lighting fixtures. Place lights almost 6 to 10 feet apart. This helps make sure the illumination is nice and even. FAQs about Driveway Illumination How far apart should driveway lights be? For most driveways, spacing lights 6 to 10 feet (1.8 to 3 meters) apart keeps things balanced. Close enough to guide the path, but not so close as to feel crowded. If you have a narrow driveway, stay on the lower end, around 6 to 7 feet apart. For a wider driveway, an 8 to 10-foot distance will make sure the space doesn’t appear too busy. For bright fixtures, space them apart as strong beams travel farther. Softer lights should be closer together so there aren’t any dark gaps. What are the best lights for a driveway? If we had to pick just one, we’d vote for bollard lights. These sit low and spread light downward, which keeps the driveway visible without harsh brightness. Bollards provide targeted illumination with minimal light spill (exactly why they’re great for driveways). What is the best way to light up a driveway? The best way to light a driveway is to layer low-level lighting. Use path or bollard lights to guide edges; add strip lights for structure; and include spotlights for depth. Keep brightness soft and evenly spaced. Focus on visibility and flow, not harsh illumination. What are the different types of driveway lights? Driveway lights come in several types. Popular options go as: bollard lights, LED paver lights, step lights, LED strip lights, spotlights, wall wash lights, and post lights. You’ll also find solar-powered and motion sensor lights. Each type serves a different purpose. How to light up a driveway entrance? Use layered lighting to define the entrance clearly. Install post lights for presence; add uplighting for nearby trees; and line edges with low path lights. Keep brightness warm and controlled. The goal is a welcoming glow that guides movement and highlights the entry point. Conclusion Driveway lighting truly defines how your home feels when someone arrives + it’s a lot about seeing where you’re going. When you focus on the right fixtures, you can turn a simple driveway into something more structured and impressive!
5/8/2026
Solar lights need regular cleaning for optimal brightness and battery life. If you don't do it, they will become dull. Secondly, they might not last the whole night as they used to do when they were new. Let's see how to clean a solar light to restore brightness. We will share the step-by-step process to clean the lens, solar panel, and remove the cloudy/yellow tint. Part 1. Why Cleaning Solar Lights Is Important Solar lights have a solar panel attached, which is responsible for converting solar energy into electrical energy to charge the battery. If the solar panel has a layer of dust or grime, it will reduce the solar panel's efficiency by 10-15%. It simply means the solar panel will generate less electricity, and it might not fully charge the battery. Secondly, a solar light has a transparent cover to emit light. If the cover is dirty, the output is reduced. The light scatters and appears dim, even if the battery is fully charged. Therefore, it's better to clean it regularly so that light can pass through the cover and deliver the rated lumens. Part 2. How Often Should You Clean Solar Lights? The frequency of cleaning solar lights depends on the dust and pollution in the region or area you live in. In clean suburban areas, you need to clean solar lights less frequently, while in dry, dusty, and coastal regions, you have to be more careful. It varies according to the situation. However, the goal is to keep the solar panel and transparent cover clean. There shouldn't be a layer of dust or grime to affect the performance. Inspect solar lights every month. If there is any dirt, you should clean it. In suburban areas, it takes 2-3 months to have a significant layer of direct. In a dry, dusty, and coastal region, you must clean the solar light every month. But if there was a storm, you should clean up after that. In the case of pollen season, you may need to clean early. Part 3. What You'll Need to Clean Your Solar Lights You need a few things to clean your solar lights properly. Soft microfiber cloth Mild dish soap Soft-bristle brush Vinegar Cotton swab You must avoid abrasive items and harsh chemicals. Part 4. How to Clean Solar Lights? Step-by-step Guide Step 1: Take a dry and soft cloth and get rid of the loose debris from the solar panel, light housing, etc. Be gentle and remove as much as you can. Use a soft brush to clean the corners, bezel, and seams. Step 2: Take a bucket of water, preferably warm, and add a few drops of mild dish soap. Mix it well. Dip a microfiber cloth in the bucket. Wring it out to remove excess water. The cloth should be wet but not dripping. Step 3: Wipe the solar light. Do it in circular motion and cover every space. If there is any stubborn stain or bird dropping, do not apply force or scrub the area. Instead, make it wet by leaving the wet cloth for 30-40 seconds. Then, gently wipe the area. Step 4: Use a new microfiber cloth and damp it with plain water. Wipe the solar light again to get rid of the soapy residue. Step 5: It's time to dry out the surface. Use a dry microfiber cloth and gently buff on the area. Step 6: Finally, check the battery compartment. If there is any white or green powder on the terminals, you should clean it. Remove the battery, and use a cotton swab dipped in vinegar. Gently clean the terminals and then use a dry cotton swab. Once the terminals are dry, insert the batteries again. Part 5. How to Restore Cloudy or Yellowed Solar Light Panels The solar panel and the plastic lens turn yellow or cloudy after long-term UV exposure. It's extremely common, and it indicates that the plastic has been oxidized. If the plastic on the solar panel is oxidized, it will scatter light before it reaches the solar cells. Thus, the performance of the panel is affected. Secondly, the oxidized lens will make the bright light dull. Thus, it is necessary to restore it. After deep cleaning the solar lights, you can restore the cloudy surface. For this, you need a non-whitening toothpaste. Put a pea-sized amount on the solar panel and lens. Use a dry, soft cloth and rub the toothpaste over the surface firmly. Rub in circular motion for about 2 minutes. Finally, wipe clean with a damp cloth. You can also find plastic restorers online. These are specifically for car headlights. They can break down the oxidized layer and make it cleaner. After cleaning, apply a layer of UV clear coat. It re-seals the plastic and prevents it from turning yellow or cloudy again. Part 6. Pro Maintenance Tips to Keep Your Solar Lights Bright Inspect solar lights every two weeks. If it's dirty, you can wipe the surface for quick cleaning. And do regular deep cleaning every 1-2 months, depending on the area you live in. Always apply a solar shield to protect the light from harmful UV rays. It reduces the life of the solar light. After cleaning, apply a thin coat of plastic UV-protectant. Check the battery every month. If the terminals are oxidized, clean them. If the battery is leaking, replace it. Go with a high-quality battery recommended by the manufacturer. NiMH batteries are excellent. For better performance, check if there is any shadow on the solar panel during the day. It could be due to a tree or a neighbor's house. If there is any shadow, it's better to change the position. Part 7. When to Replace Outdoor Solar Lights Instead of Cleaning Solar lights have a limited life. If you see the following issues and signs, it's better to replace the light instead of cleaning. Replace if: The solar panel is severely damaged. The microcracks and cloudy surface won't let it generate enough electricity. The light lens is extremely yellow, reducing the brightness. In normal cases, you can clean it to some extent, but if it's too yellow, replace it. There are issues with the wiring, batteries, and terminals. Replace the light as the repairs will cost more. When you see the signs of water damage, replace the light. For optimal performance, you can go with the Govee Outdoor Solar String Lights. With the RGBICW technology and LuminBlend™, you can enjoy 16 million colors to set the desired ambiance and mood. It's equipped with a 6W high-power solar panel and a high-capacity battery to offer 13 hours of performance from dawn to dusk. It's built for harsh outdoor conditions and is also IP67 waterproof. Enjoy 100+ preset scenes, music sync, and smart controls. FAQs about Solar Light Cleaning Can you use WD-40 to clean solar lights? No, do not use WD-40 to clean solar lights. It's not a cleaner; it's a lubricant. It will attract more dust and debris and create a thick layer of grime in no time. It can also damage low-quality plastics. How to remove the haze on solar lights? The haze on the solar lights is due to UV oxidation. After deep cleaning, use a small amount of non-whitening toothpaste and rub it with a microfiber cloth for 2 minutes. Wipe clean with a damp cloth. How to bring solar lights back to life? First, you should deep-clean the light. After that, check the battery compartment. Clean the terminals and replace the battery. If the panel and lens are cloudy, use toothpaste to clean them. Then, check if the light is working or not. If it is still not working, replacement is a better option. Do you take the clear film off solar lights? Yes, it is necessary to remove the clear film on new solar lights. Otherwise, it will reflect a portion of light and reduce efficiency. Secondly, it will stick to the solar pane and lens due to heat, so it will be a bit difficult to remove it later. What is the best thing to clean solar lights? A mild dish soap is excellent for cleaning solar lights. It does not damage the solar panel or the light lens. Is Dawn dish soap good for cleaning solar panels? Yes, you can use Dawn dish soap for cleaning solar panels. It's non-abrasive, gentle, and an excellent degreaser. It effectively cleans the solar panel and lens. Conclusion Cleaning can restore the brightness and performance of solar lights. However, you must do it the right way. Otherwise, you might end up damaging the delicate solar panel and light lens. We have explained the step-by-step process that you can easily follow to improve the light's performance. But if the light is in pretty bad condition, it's better to buy a new one instead of cleaning it.
4/29/2026

