


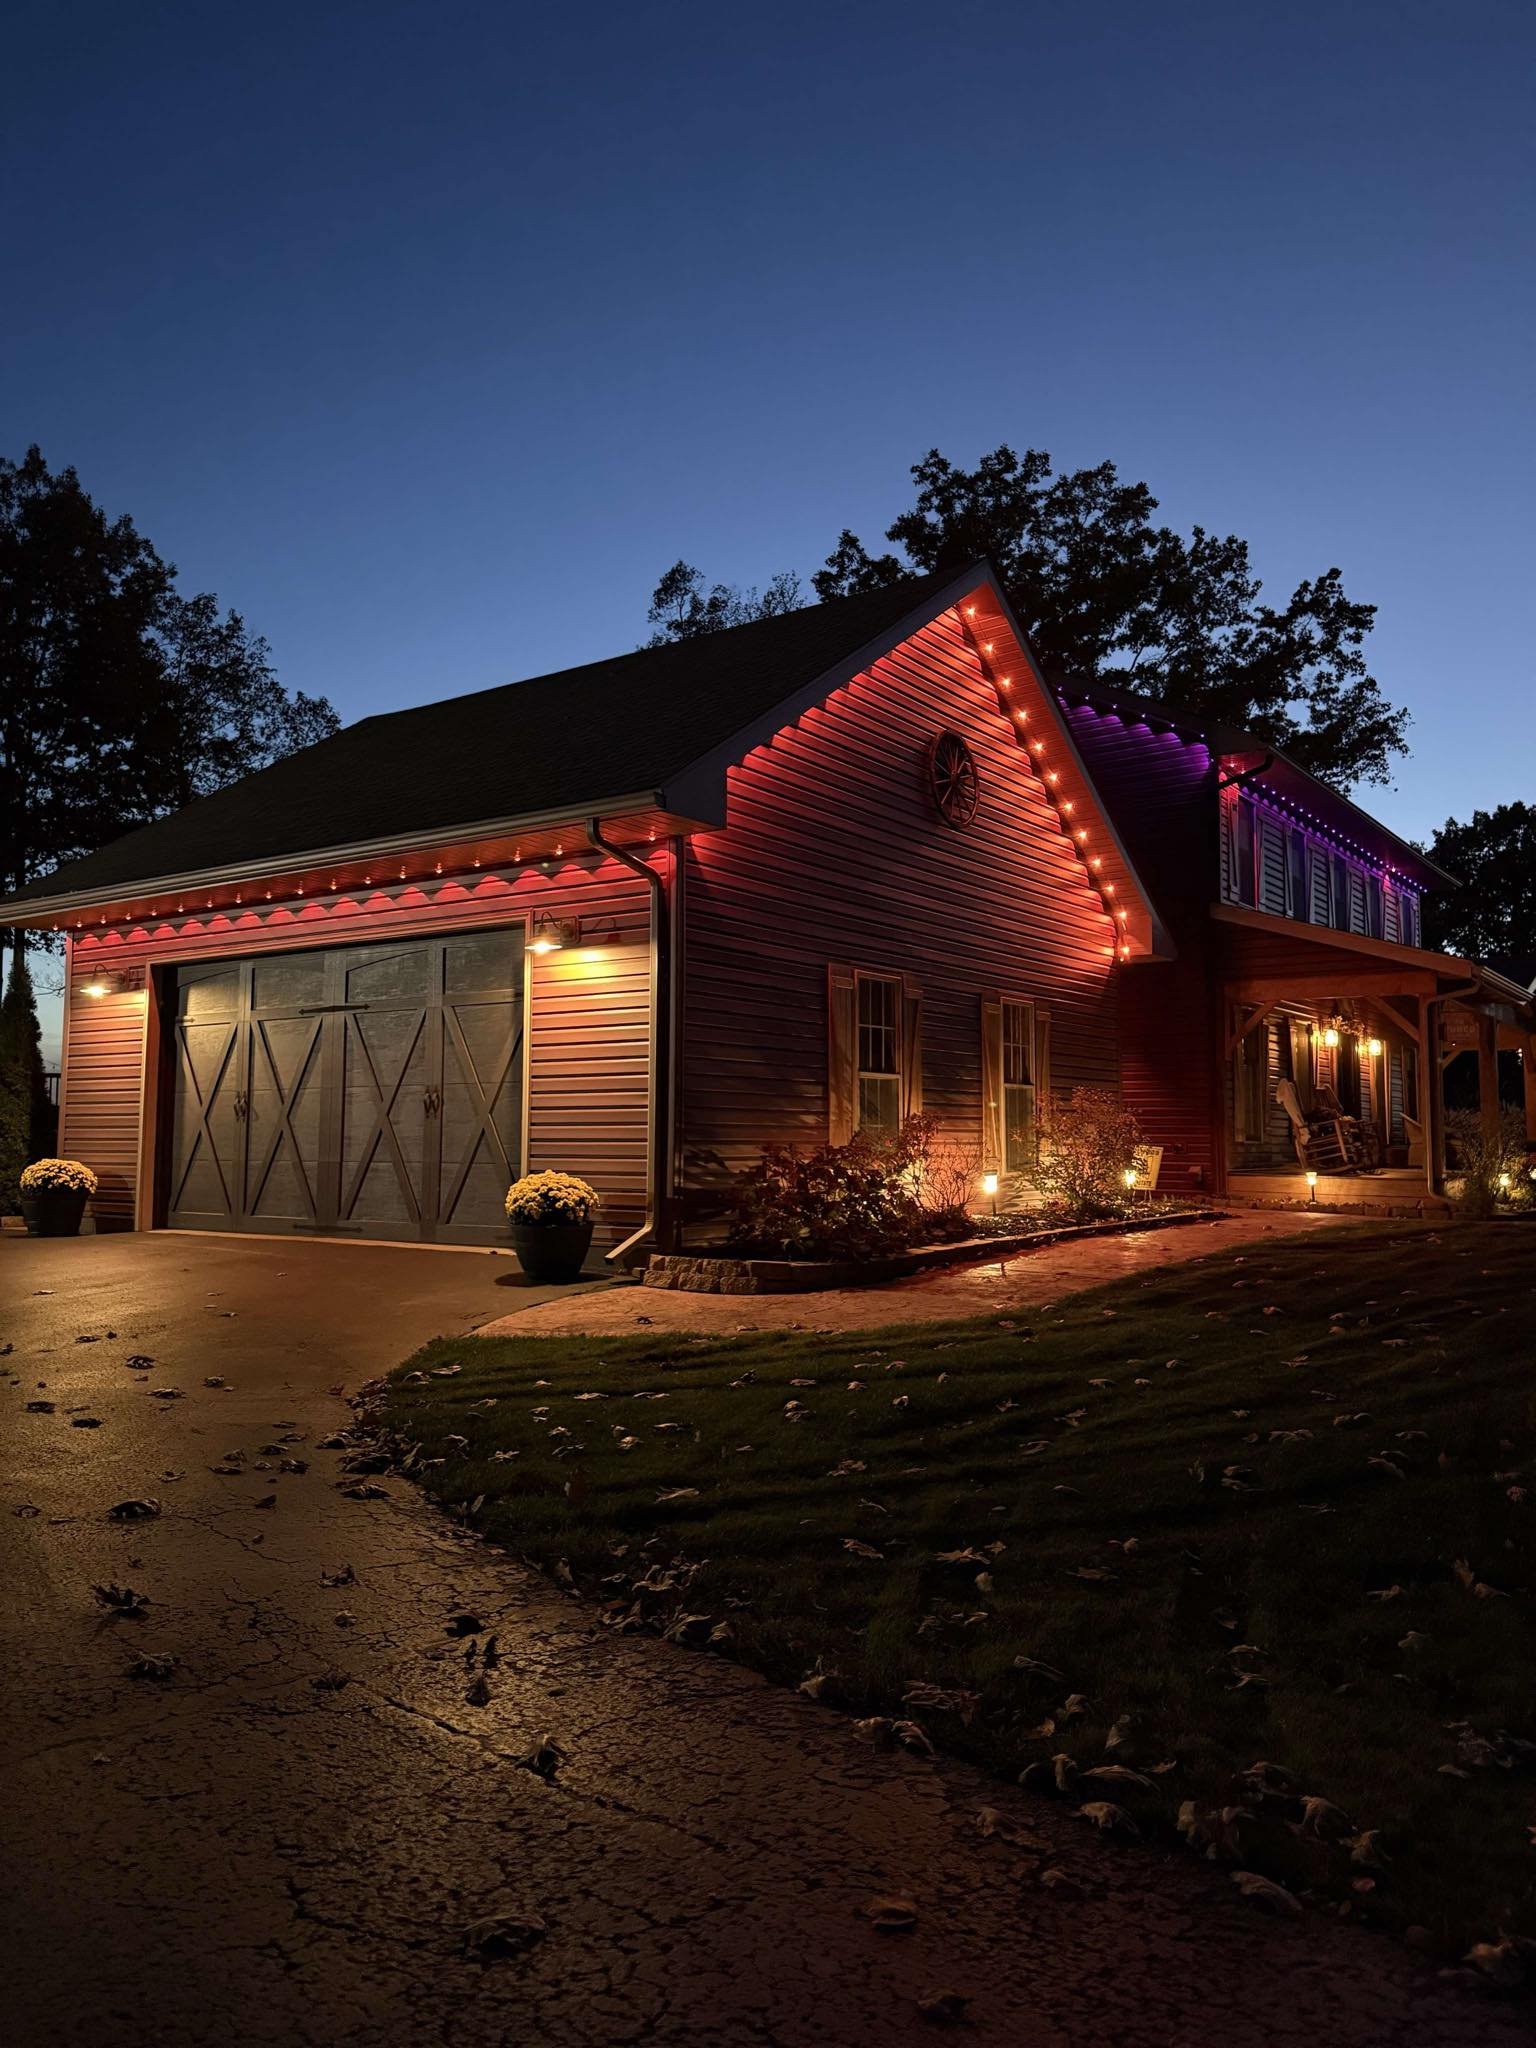


*Govee is the the No. 1 brand for household permanent outdoor lights in the USA. Not sure which permanent Christmas lights are right for your home? This guide compares Govee’s top 3 models, covering features, pros, and cons, and highlights brightness, durability, smart features, and prices to help you find the perfect lights for year-round outdoor charm. Govee Permanent Outdoor Lights Comparison The selection of the appropriate Govee permanent outdoor lighting model will follow the preferences of brightness, technology, and cost. The strength of each variant is distinct, including flagship excellence or low-end functionality. Products Govee Permanent Outdoor Lights Prism Govee Permanent Outdoor Lights Pro Govee Permanent Outdoor Lights 2 Model H707A/B/C H706A/B/C H705D/E/F Colors RGBWWIC(Multicolor + Warm White + Cool White Lighting) RGBWWIC(Multicolor + Warm White + Cool White Lighting) RGBWIC(Multicolor + Warm White Lighting) Color Temperature up to 6500k up to 6500k up to 4000k Waterproof IP68 IP67 IP67 Lumens 60 lumens per light 50 lumens per light 40 lumens per light Scene Mode 100+ 75 100 Cuttable ✅ ✅ ❌ Matter ✅ ✅ ✅ Price (100ft) $539.99 $439.99 $329.99 In general, H707A is the most technologically advanced and robust, H706 is the most versatile choice, and H705 is the best value pick! Top 1: Flagship - Govee Permanent Outdoor Lights Prism (H707A/B/C) The Govee Permanent Outdoor Lights Prism is newest model, launched in September 2025. It is the industry's first and only flagship permanent outdoor lights to feature a triple-color lighting effect with a dynamic optical design. Govee's R&D team completed thousands of tests and refinements, to create a completely customized optical structure that fits into a compact design, resulting in that looks perfectly balanced to the human eye, with each zone blending smoothly without any overlap. Key Features Triple-Colour Lighting Effect: With an innovative triple-color lighting effect in one head, the lights can create smooth gradient color lighting. State-of-the-art Colour Performance: 16 million smooth gradient effects driven by the RGBWWIC and Luminblendtm technology. Simple DIY Modification: These are permanent LED house lights, which can be cut, spliced, and shortened to fit any roofline to a smooth and custom appearance. All-Weather Durability: IP68 waterproof lights. Built for temperatures from -22°F to 140° Dynamic Scene Lighting: Upgraded to 100+ Preset Lighting Scenes Smart Multimode Control: These lights can be controlled using Govee Home App, Matter, or Alexa/Google Assistant voice control, so that they can be the most convenient. Pros ✅TÜV Rheinland Certification for Proven Durability ✅Creates Smooth Gradient Color Lighting Effect ✅Custom LEDs and Proprietary Chipsets That Surpass the Industry Average by More Than 150% Cons ❌More expensive than other models. Top 2: Premium - Govee Permanent Outdoor Lights Pro (H706A/B/C) The permanent lights pro is the most versatile choice. It’s cuttable, extendable, and customizable, making it perfect for DIY families. This high-end line brings architectural light into a new dimension of smooth colour changes, extreme brightness, and a high degree of control using the advanced technology of RGBICWW. It is a perfect mixture of warm whites and vibrant colours, which is ideal for delivering a high-end style in all seasons and occasions. Key Features Cuttable and Extendable: It can be cut and connected to more lights. The overall length should not exceed 200 ft (60 m). Warm White and Cold White Lighting: RGBWWIC produces a clear white light instead of a purplish-white light. Outdoor Reliability: IP67 waterproof lights. Smart App, Voice Control: Use Matter, Alexa, and Google Assistant with permanent lights that are Smart and have Voice Control. Pros ✅ Unsurpassed brightness and realistic colouring. ✅ Multicoloured and white year-round lighting. ✅ Long-lasting durability and reliability, Industrial-grade. ✅ Well-laid-out smart home functionality and remote control. Cons ❌Uses a little more energy compared to other models because it is the brightest Top 3: Standard - Govee Permanent Outdoor Lights 2 (H705D/E/F) Govee Permanent Outdoor Lights 2 is the best value pick, an entry-level permanent light offering unbeatable affordability! They are perfect for Christmas decorations, romantic evenings during Valentine's Weekends, and on the spooky nights during Halloween. A luminous home would be created with 100 scene modes and 16 million colours to create mesmerising and special effects. Key Features Advanced RGBICW Lighting: It is a refined product, and its light effect appears smooth through 16 million precise colours. Soft and monotonous with no tint of purple in the white light. AI Light Show: In addition to preprogrammed 100 Scene effects and custom lighting, the AI-generated lighting effects personalise your atmosphere by just a word of command at any party and sporting activities. Strong and Sturdier: Featuring anti-UV materials and an easy-to-carry waterproof body, control box, and power adapter, the permanent Christmas lights perform well in bad weather, whether in summer or winter. Smart Home Integration: Control and view everything with the Govee Home App, Alexa, and Google to create a versatile lighting system—single tap to build a light display with music mode or DreamView. Pros ✅ Best bang for the buck quality visuals. ✅ An easy installation process is suitable for beginners. ✅Smooth app management and voice recognition. ✅ Good performance in changing weather. Cons ❌ A little less advanced effects than the flagship and Pro models. ❌This strip of light is uncuttable. ❌No cold white light Explore more Christmas Lights >> How to Choose the Best Outdoor Permanent Lights? When investing in permanent outdoor lighting, one should not be limited to colour or design only. These right lights must be long-term, durable, and intelligent, which fit your lifestyle and surroundings. These are some of the considerations that would assist you in selecting the ideal permanent outdoor lights. 1. LED Technology Choose high-efficiency LEDs with either RGBIC or RGBICWW technology to have colours that are vibrant and customizable, and use less energy. The current LEDs have extended lifespan and enhanced light consistency, reducing the expense of maintenance in the long run. 2. Weatherproof Design The outdoor lights have to be resistant to rain, UV radiation, and temperature variations. IP65 or greater waterproof ratings will be found, and these will guarantee long durability and reliability during extreme weather. 3. Material Quality Choose lighting systems that are constructed using strong materials, e.g. UV-resistant plastic or aluminium. The high quality of the materials ensures that the product looks and works well after resisting corrosion, fading, and heat damage. 4. Smart Features Outdoor lights in the modern world effortlessly combine with applications and voice assistants. Smart controls allow scheduling, automation and long-distance changes, and they provide maximum flexibility to brightness and colour scenes. 5. Installation and Durability Select lighting systems that have a modular or clip-based installation to enable easy installation. Secure mounts and stable power adapters should be incorporated into the permanent fixtures to eliminate the problem of detachment or wiring problems. 6. Warranty and Support A good warranty and customer responsiveness are signs of confidence from the manufacturers. Most permanent outdoor light brands offer a 1-year warranty, but Govee permanent outdoor lights provide an extended 3-year warranty for added durability. FAQs About Best Permanent Outdoor Christmas Lights; Q1. What Are the Best Permanent Outdoor Lights? Govee Permanent Outdoor Lights Prism are the best choice for premium outdoor lighting. As the industry's first and only flagship permanent outdoor lights with a triple-color lighting effect, dynamic optical design, and IP68-rated light modules, they deliver stunning year-round illumination with exceptional durability in any weather. Q2. How Long Do Permanent Outdoor Lights Last? Most high-quality LED permanent lights have a service life of 20,000–50,000 hours, depending on both usage and the environment. Govee permanent outdoor lights offer an ultra-long lifespan of up to 50,000 hours. Q3. Are Permanent House Lights Worth It? That is true, long-lasting house lights are a good investment. They are season-free, efficient in energy usage due to the use of LEDs, and improve the property's appearance. Also, intelligent lighting enables homeowners to create holiday, party, and everyday lighting scenes - which can be controlled using an app or voice assistant. Q4. How Much Does It Cost to Have Permanent Outdoor Lights Installed? Each brand, length, and complexity of installation differ in terms of the total cost. It is estimated that DIY installations are between 300 and 600 dollars per 100 feet of lighting on average. An installation of a professional nature, particularly in a large house / complicated roofline, will fall between 1,000 and 3,000 dollars. The initial cost might be high, but the savings, convenience and aesthetic value in the long run make permanent outdoor lighting a prudent and enduring enhancement. Read more: The Average Cost for Christmas Light Installation Conclusion To sum up, the smartest way to make your exterior look beautiful is to invest in the most beautiful permanent outdoor lights that use little energy. Govee lights are the best of the available lights, as they have smart technology, bright colours, and extended functionality.
4/17/2026
November 1, 2026: We added a two-story budget that compares DIY permanent Christmas lights, professionally installed permanent lights, and five years of seasonal installation, including hardware, safe access, and replacement parts. We also updated the product prices and the professional installation cost. A question about how much permanent Christmas lights cost has become very common when it comes to lighting up the house. These new lighting systems can provide year-round brightness, whereas some lighting systems require seasonal installation. Here, we are going to unpack all you need to know about pricing, installation cost, and value —helping you decide if the permanent lights are worth the investment. Part 1. What Are Permanent Christmas Lights? Permanent Christmas lights are also known as long-run LED lights that are installed by a professional on the roofline, eaves and architectural features of the home. They are designed to be left there all year round, unlike the traditional string lights, which are installed and removed seasonally. They allow the homeowners to alternate between the holiday party lights and the classy daily ones with the help of smartphone apps or remotes. They are made to resist every weather condition, are energy efficient, and are durable and versatile in terms of appearance. Part 2. DIY vs. Professional Cost of Installing Permanent Christmas Lights Homeowners usually look at the difference between home installation and professional installation when it comes to the Cost to Install Permanent Christmas Lights. A DIY system can be considered affordable, with a cost of between $300 and $2,000 for materials, based on the type of lighting system and the length needed. Nonetheless, home-made installations require time, accuracy, and electrical expertise to ensure safe wiring, waterproofing, and aesthetic conformity. Professional installation, on the other hand, costs about $3,500 on average, again depending on the size of your home, complexity of the design and features that are chosen. Once measurements, mounting, power connection and software integration are dealt with, your system performs perfectly and appears to be part of your building. The Govee Permanent Lights kit is simple to install, and most customers can do it themselves, saving on expensive professional installation. Learn more with our step-by-step guide on how to install Govee Permanent Lights. Two-Story Permanent Christmas Lights Cost, DIY vs. Professional Over 5 Years For a two-story house, the five-year cost of DIY permanent Christmas lights depends on the kit, safe access, and spare parts. Govee Permanent Outdoor Lights Pro is best for homeowners who can reach every eave safely and want the best value: the 200ft kit is $759.99 as of November 1, 2026 , and spare extension lights, a control box, and an adapter are sold on the same product page. Compare every option below. Here is a five-year view for a two-story home with about 200 feet of roofline. Option Upfront cost Each season after that 5-year total Who handles roof access Best for DIY with Govee Permanent Outdoor Lights Pro (200ft) $759.99, plus any ladder or access gear you need $0 for installation $759.99 + your access cost + a spare-parts reserve (extension lights, a control box, and an adapter are sold separately) You Homeowners who can reach every eave safely and want the best value, with spare parts on the same product page DIY with Govee Permanent Outdoor Lights 2 Pro (200ft) $799.99, plus access gear $0 for installation $799.99 + your access cost + a spare-parts reserve You Harsh winters (-22°F to 140°F rating, IP68 lights) or rooflines you want to split into separately controlled zones with the Y connector Govee kit plus hired help for the high sections Kit price + one local labor quote $0 for installation Kit + one labor bill An installer for the upper roofline, you for the rest Two-story homes with reachable lower eaves and a steep upper roof Professionally installed permanent lights About $3,500 on average $0 for installation About $3,500, plus any new outdoor outlet The installer Steep, high, or complex rooflines when you want one bill Seasonal installer every year 350–800 per season (about $450 on average) $350-800 $1,750-4,000 The installer, every year Homeowners who want a new look each year or no lights on the house between seasons Govee prices from Govee product pages, checked November 1, 2026. Installer figures are national estimates for two-story seasonal lighting and permanent installation. Totals exclude electricity and your own time. Five-Year Cost of DIY Permanent Christmas Lights vs Yearly Seasonal Installation At the national average of $450 per season, hiring someone to hang Christmas lights costs approximately $2,250 over five years. The Pro 200ft kit costs $759.99, leaving about $1,490 for safe access and future spare parts before DIY reaches that total. Professional seasonal Christmas light installation for a two-story home with 150 to 250 feet of lights costs $350 to $800 per season, and most installers charge $2 to 350 to $800 per season. To calculate your own savings, use: Break-even seasons = (kit price + access cost + spare-parts reserve) ÷ your yearly installer quote Without additional expenses, $759.99 ÷ $450 is approximately 1.7 seasons. That means the kit could pay for itself during the second season. Every additional $450 spent on safe access or replacement parts pushes break-even back by another season. However, compare like-for-like quotes. Ask whether your seasonal installer includes the lights themselves, removal, and storage. At the lower seasonal quote of $350, five years costs $1,750, only about $990 more than the Pro kit. If reaching your upper roofline requires expensive equipment or professional help, DIY may offer smaller savings than expected. DIY vs Professional Permanent Light Installation on a Two-Story House DIY installation means paying for the lighting kit and whatever safe-access equipment you need. Professionally installed permanent lights cost an average of $3,500, potentially more if an electrician must add an outdoor outlet. The biggest safety difference is who climbs to reach the upper roofline. OSHA's ladder rules for construction work call for an extension ladder to extend 3 feet above the landing and to be set at about a 4-to-1 angle, which is a good baseline for anyone working on a two-story roofline. Even with a suitable ladder, certain conditions make DIY installation a poor choice: Reaching the eaves on a steep roof requires stepping onto the roof itself. Reaching an eave means leaning sideways from the ladder. Uneven ground or shrubs prevent stable ladder placement. Rain, ice, or strong winds make climbing hazardous. High gables and steep sections may require a boom lift or fall-protection equipment. Include a quote from your local equipment provider or installer in the budget, rather than assuming a ladder is sufficient. OSHA identifies falls as the leading cause of work-related deaths among residential construction workers. Its construction guidance is a useful safety reference, not a claim that workplace rules automatically apply to homeowners. A practical compromise is to install accessible lower eaves yourself and hire a professional for the upper gables. Govee permanent outdoor lights are DIY kits, so install every eave you can safely reach yourself, and hire a professional for the sections you cannot reach. Budget for Product, Labor, and Future Replacement Work A permanent roofline lighting budget should cover lifespan, warranty, and replacement or repair costs, not just the kit price, because every repair on a two-story house means another trip up the ladder. 1. Product: Measure the roofline and choose the appropriate Pro 100ft, 150ft, or 200ft kit, or the 2 Pro 100ft or 200ft kit. 2. Labor: DIY installation has no hired installation charge. For a mixed approach, request a quote for the high sections only. 3. Safe access: Include your quote for ladders, stabilizers, lifts, or other necessary safety equipment. 4. Power: Check outlet placement. The Pro adapter is for indoor use only, while the 2 Pro control box and power adapter have IP67 ratings. Budget for an electrician if a suitable outlet is missing. 5. Replacement reserve: Set aside money for compatible parts and the safe access needed to service them. Both models have a 3-Year Warranty. Pro LEDs are rated for up to 50,000 hours, while 2 Pro lists a 50,000+ hour lifespan. For Govee Permanent Outdoor Lights Pro, replacement extension segments, a control box, an adapter, and a driver module are sold separately on the product page, so check the current price of each part when you set your spare-parts reserve. Confirm compatibility before you cut, splice, or extend your lights. The upgraded Black 200ft kit (H706C) is incompatible with older H706C strips and existing booster modules or control boxes. The 2 Pro features snap-on detachable light heads and strings that can be cut, extended, or reconnected, but its product page does not separately list replacement heads or segments for purchase. Govee Permanent Outdoor Lights Pro: Best for Value and Spare Parts You Can Order Govee Permanent Outdoor Lights Pro is best for two-story homeowners who can safely reach their eaves and want strong value, with separately available extension lights, a control box, and an adapter. Keep installation costs down with three steps: 1. Measure first. Choose 100ft for $439.99, 150ft for $599.99, or 200ft for $759.99, as of November 1, 2026. Runs above 150ft require a driver module, included with the 200ft kit. Total length, including extensions, cannot exceed 200ft. 2. Hire an installer only for sections you cannot reach safely. 3. Plan safe access before installing each section. The 200ft Pro costs $40 less than the 2 Pro. It also offers separately sold extension lights, a control box, adapter, and driver module, plus a 3-year warranty and up to 50,000 hours of LED life. There are two limitations. First, its IP67 lights, IP65 control box, and -4°F to 140°F operating range differ from the 2 Pro's higher weather ratings; the adapter is for indoor use only. Second, the kit doesn't eliminate the cost or risk of reaching high eaves, and upgrading to H706C compatibility requires care. Choose Pro when most eaves are safely accessible, and a suitable indoor outlet is available. See all three lengths on the Govee Permanent Outdoor Lights Pro product page. Govee Permanent Outdoor Lights 2 Pro: Best for Harsh Winters and Zoned Rooflines Govee Permanent Outdoor Lights 2 Pro is best for homeowners who want Govee's top-tier weather protection: IP68 lights, an IP67 control box and adapter, and a -22°F to 140°F operating range. The 100ft kit costs $499.99 and the 200ft kit $799.99, as of [insert publish date]. Snap-On Detachable Light Heads and cuttable, extendable, reconnectable strings offer installation flexibility. A Y connector lets you split front and side rooflines into separately controlled zones. At 200ft, 2 Pro costs $40 more than Pro. However, its product page doesn't offer individual light segments, heads, or control boxes for separate purchase, and you cannot replace individual LEDs like bulbs. Unlike Pro's indoor-only adapter, the IP67-rated 2 Pro adapter can remain outdoors. Both models carry a 3-Year Warranty. Always follow the product manual and local electrical codes. For hardwired installations, hire a licensed electrician. Part 3. Factors Influencing the Cost of Permanent Christmas Lights These factors can help to determine the extent of the permanent Christmas lights cost, assisting you in making an informed decision on the investment. 1. Linear Feet/Home Size The number of linear feet of your home is the primary consideration in determining the price of permanent Christmas lights. According to HomeGuide, most professional installers charge by the linear foot, with average costs between $20 and $40 per foot for lights and installation, or about $2,000 to $8,000 total for 100–200 linear feet. However, if you install Govee’s permanent outdoor lights yourself, Govee Permanent Outdoor Lights 2 starts at $179.99 for 50ft; Govee Permanent Outdoor Lights Pro, the best value, costs $439.99 for 100ft, $599.99 for 150ft, and $759.99 for 200ft; and the top-tier Govee Permanent Outdoor Lights 2 Pro and Govee Permanent Outdoor Lights Prism cost $799.99 and $859.99 for 200ft, as of November 1, 2026. 2. Quality and Features of the Lights Permanent lighting systems are not all. Price is highly dependent on the quality of materials, levels of brightness and other features. Those high-end LED light strands, which include integrated aluminium tracks, waterproof layers, and UV-resistant materials, are more expensive but offer a longer lifespan and a more polished appearance. Customizable light patterns, dimming features and seasonal settings are also found in the high-end models, giving you the option of switching between Christmas red and green to subtle white, which can be used the rest of the year. These additional capabilities not only increase the visual effects but also warrant the increased investment. 3. LED Type and Color The kind of LEDs and colour palette you use permanently with your lights are very important factors in terms of cost. Rudimentary RGB lights (red, green, blue) are cheap and readily available, whereas the RGBIC or RGBW LED offer more control of colour and dynamic effects at a higher cost. RGBIC LEDs have the capability of controlling the colour of each segment individually, and thus, more advanced animations and gradient effects are achievable. RGBW LEDs come with an individual white diode to achieve a more natural, clean diode light, which would be used throughout the entire year. In case you want to see bright and customizable colours depending on the holiday or event, it may be a reasonable investment in the RGBIC technology, such as the Govee Permanent Outdoor Lights. They provide millions of colour combinations, much higher brightness, and a smooth transition, and this feature puts them on the edge in terms of performance and appearance. 4. Smart Technology Permanent Christmas lights today are not only controlled by the simple on/off switch. The smart lighting technology has emerged as one of the most significant cost drivers, providing greater functionality and control. The devices can be connected to Wi-Fi or Bluetooth to control your lights using a mobile app, voice assistant (such as Alexa or Google Assistant), or even automated schedules. Others have music synchronisation features —lights blinking and colour-changing to the beat of your favourite music —to recreate the atmosphere of an immersive party and holiday. Although these intelligent capabilities will increase your overall price by 10-20 per cent, they will offer unmatched convenience and personalisation. 5. Durability and Waterproof IP Rating Outdoor lighting should be able to withstand the challenging weather conditions all year round. This is why durability and waterproof rating are some of the critical determinants of the cost. Those lights that are rated higher on IP (Ingress Protection) give greater protection against dust and water. IP65: water jets and dust-proofed- can be used in most climates. IP67: Heavy rain or temporary submergence -suitable in areas with heavy rain or coastal. 6. Installation Complexity Another significant amount of money is involved in the total cost, which is the installation. A simple single-story roof is easy to manage, whereas more work, time, and safety gear are needed for multi-storey houses, sloping, or irregular roofs. Professional installation costs an average of about $3,500, depending on the layout. The labour costs may go up when the wiring needs to be adjusted, when smart controllers need to be installed in the home's electricity system or when the insulation needs to be installed to hide the wires to provide a better look. Although a DIY installation may appear to be inexpensive, a professional installation will guarantee that the system is safe to use, has an aesthetic finish, and is long-lasting. 7. Maintenance, Warranty & Lifespan Even though permanent Christmas lights are engineered to last several years, in some instances, a service or changing of the parts may be needed. Systems that have longer warranty periods normally denote superior quality parts and more confidence in the manufacturer. An example is the Govee Permanent Outdoor Lights, which come with a 3-year limited warranty, while other brands have a 1-year warranty.This is a warranty of defect and some malfunction which guarantees us long-term value on our investment. The majority of LED have a life of 50,000 to 100,000 hours, approximately 10-15 years with normal use. 8. Customisation and Add-Ons Design Most people who own homes would want to emphasise architectural elements, which include columns, windows, decks, or pathways, and this involves additional light strips, controllers, and programming. Many upgrades can involve: Separate control of various sections of houses through colour zoning. Music syncs with the festive animations. Remote access controls of an app on the cloud when not at home. Power consumption-efficient transformers. All these upgrades will increase the initial cost, but will significantly enhance aesthetics and convenience. 9. Power Consumption and Energy Efficiency The costs can be affected by the initial and ongoing expenses of using energy-saving LED systems. The amount of electricity used is much less in LED bulbs as compared to traditional bulbs, but the overall quantity of lights and their brightness levels influence the energy bills. The vast majority of permanent lights are low-voltage, ranging from 12 V to 24 V, and use a significantly reduced amount of energy compared to traditional incandescent lights. Nevertheless, more light and intelligent capabilities can attract an increased amount of power and should be considered in the long-term expenses. 10. Brand Reputation and Support Finally, the brand that you adopt affects pricing. Govee is an established company offering superior service, enhanced durability, and comprehensive warranties. Premium brands spend on research, application development, and customer care- so you are assured of uniform performance and updates. Using a familiar brand will ensure that your lights are compatible with smart home technologies and that replacing parts will be easy in the future. Part 4. FAQs About Permanent Lighting on House Cost Q1. Are Permanent Christmas Lights Worth the Cost? Yes. Homeowners who want the convenience of having permanent Christmas lights, curb appeal and versatility throughout the year should consider investing in permanent Christmas lights. They not only get rid of the inconvenience of installing every year, but also provide a long-term value to the house. Q2. How Long Do Permanent Outdoor Christmas Lights Last? Good quality LED systems may have a life of 10-15 years or 50,000-100,000 working hours. Their durability is determined by the materials, waterproofing, and quality of installation. Q3. What Is the Average Cost of Permanent Christmas Lights? Most permanent Christmas lights cost between $439.99 and $799.99 (excluding installation), depending on house size, lighting color, and smart-technology features. High-quality products such as Govee Permanent Outdoor Lights are provided with the best quality, extended warranty, and color control to achieve the long-term performance. Q4.Are DIY Permanent Lights Worth It for a Two-Story House With a Steep Roof? Only if you can safely reach the steep sections. Otherwise, buy the kit and hire professional help for the high runs. Five years of seasonal installation averages about $2,250, versus $759.99 for the Pro 200ft kit as of [publish date]. The difference must cover safe-access costs and replacement parts. Never risk a dangerous climb just to save on installation. Conclusion Being aware of the Permanent Holiday Lighting Cost is a good way of ensuring that homeowners spend their money in beauty and comfort. To achieve sustainable quality, vibrant colors choice, and smart controlling, Govee Permanent Christmas Lights will be the most appropriate. Upgrade your home today using the high quality permanent lighting system of Govee--brilliance all year round.
11/1/2026
Curtain lights can transform any boring wall or window into a cool, romantic one. With a festive event or a warm bedroom atmosphere or even a wedding background, knowing how to hang a curtain light properly will have a spectacular, safe and beautiful set-up. Let us see what the easy steps are! Part 1. Tools & Materials You’ll Need for Hanging Curtain Lights In order to install your curtain lights, you will need to bring forth all the necessary tools and materials that will enable the process to be more efficient and easier. Curtain lights, adhesive hooks, clips, extension cords, measuring tape, step ladder and zip ties or twist ties used to fix wires will be required. If you use the Govee Curtain Light, you don’t need to prepare any tools — all accessories are included in the box. Part 2. Prep for Curtain Lights Installation: Measure and Layout This is important as you need to prepare before you hang your curtain lights, otherwise you will not create a balanced and appealing appearance. Begin by determining the size of the space you will be hanging the lights in, the width and height of the place, so you can determine a wall, window, or backdrop frame. In case the installation is of several strings, decide how they will be connected to the closest power source. An effective layout plan will be used to provide ease of installation, proper alignment, and a finish that is also appealing to the eyes. Part 3. How to Hang Up Curtain Lights? Here is a detailed guide on how to install Govee curtain lights pro easily and effortlessly. Step 1. Start by opening the box of Govee curtain lights and find these items inside it: power adaptor, control box, hooks, bar cover, back shell, and the plastic strap. Step 2. Now, please connect the control box to the power box and plug it into power to ensure every curtain light works properly. Step 3. Using a cloth or tissues, clean the surface where you want to install the curtain lights. Make sure the surface is clean and dry before installation. Step 4. Attach the back shell of the fixed mounting bar to a smooth surface and align each bar seamlessly during installation. Step 5. Fix the repeater of the previous segment and insert the wire adaptor and power cord of the curtain light into the slots of the back shell. After its completion, snap the bar cover on the back shell and press firmly for 10 seconds. Step 6. Straighten out the light string before installing it, with the lamp bead facing forward. Step 7. Insert the bottom side of the string vertically into the slit of the plastic strap bead. Gently tuck the bead into the Govee, and connect the plastic straps through the clips on both sides. Finally, take a final look at your Govee curtain lights installed in the desired spot in your living room and enjoy the colourful sight. Part 4. FAQs About Hanging Curtain Lights Q1. Can You Cut Govee Curtain Lights? No, Govee curtain lights cannot be cut or shortened. A circuit system is contained in every strand, and when broken, the connection is broken, and then the lights are not able to operate as intended. When the space is small, then use it by folding or even overlapping additional parts in a way that the parts are well matched without having to cut. Q2. How to Keep Curtain Light Strands from Tangling Outdoors? To avoid the entangling of the strands, clip or tie strands on the top and bottom with transparent clips or twist ties. Do not allow the strands to flail about in a windy place. To have added stability, apply adhesive hooks in the mid-way of each strand down or place them on a mesh or net background to add form. Q3. How Do You Hang Curtain Lights on the Wall Without Nails? Nails can be well substituted with adhesive hooks, command strips or transparent clips. Wipe the surface before attaching them to make sure that they stick. Use heavy or waterproof adhesive hooks in outdoor places to ensure the durability of the same and avoid the lights falling off. Q4. How to Hang Curtain Lights for a Backdrop? To make this look classy, it is important to evenly hang curtain lights on a rod or stand with even spacing between the strands. Add soft drapes or sheer curtains at the front of the lights to create a glow and a diffused effect - perfect in the case of events, photoshoots or a wedding. Q5. What Is the Best Thing to Use to Hang String Lights? The easy hanging is easily done by adhesive hooks and clips without damage. Screw-in cup hooks or cable ties are also used to allow additional stability in different weather conditions in outdoor or long-term installations. Conclusion The simplest yet most effective way to uplift any room is by hanging curtain lights, whether it is a small bedroom or a dramatic event background. With the right tools and with proper setup, plus a touch of creativity, you can get stunning results. To create a long-lasting brightness and intelligent control, select Govee Curtain Lights Pro, durable, versatile and easy to use. Transform your decor today!
10/13/2025
Fall is associated with warm colors, warm evenings, and holiday decorations. The proper fall lighting can make your home as an inviting heaven to your loves and friends. The best fall outdoor lights are rustic fall string lights and elegant autumn tree lights, and below you will find 15 ideas to execute them in your home. Part 1. Indoor Fall Lighting Ideas 1. Fall String Lights for Living Rooms String lights are a year-round accent for decorations, but they are especially nice during the fall. Wrap mantels, shelves or mirrors in fall string lights to produce a warm glow of gold. Include them alongside the fall garland lights decorated with pinecones, pumpkins, or leaves to light up fall décor and decorate your home. image from www.decorpot.com 2.Illuminate Autumn with a Fall Lamp A color-changing floor lamp is the perfect tool for fall decor. You can switch its hues to warm amber, deep crimson, or soft gold to mimic the season’s cozy glow. It instantly adds a festive yet relaxing atmosphere to any room, making every evening feel like a crisp autumn night. 3. Fireplace Mantel Lighting If you have a mantel, put a garland light on it and entwine it with leaves and berries. String Lights with string lights to increase depth and warmth. The twinkle provides comfy seasonal ambiance even when the fireplace is not lit. image from www.bhg.com 4. Cozy Lantern Arrangements LED candles give a warm feeling with the indoor lanterns. Display them at the fireplace, at the entry or on a dining table center decoration surrounded by small pumpkins and dried oak leaves. Lanterns contribute a rustic ambiance and enhance the fall vibe and light up fall décor. They are also a safe alternative to real candles, making them perfect for family-friendly autumn decorating. 5. Autumn Tree Lights Artificial autumn tree lights with orange and amber LED leaves provide both light and decoration. Put them in the corners of your living room or windows to provide a whimsical but seasonal look. They can be worn as accessories to any interior and as a means to light up fall decor. 6. Mason Jar Lights with Fall Accents DIY mason jar lights are just about the right thing to use as part of creative fall decorations. Fill jars with fairy lights, pinecones, and acorns. Add them to shelves or put them on display on your dining table. They exude warm, farmhouse-style comfort and give another means of fun, livening up fall decor. image from www.food-life-design.com 7. Dining Table Glow Instead of poorly-directed lights that reach overhead, overlay softer fall lighting on your dinner table. Use mini autumn tree lights as a centerpiece and put the LED candles around. This makes a warm glow to family dinners and fall get-togethers. Incorporating fall-themed runners or golden placemats enhances the cozy lighting effect. 8. Warm Bedroom Lighting Add fairy lights across headboards or amber string lights that can be dimmed in the fall. Couple with plaid comforters and gourds to get the fall shape in its complete form. The subdued light adds another more relaxed touch in the evenings when it is cold outside. A bedside lantern with a soft glow can make the room feel even cozier. Part 2. Outdoor Fall Lighting Ideas 9. Enhance Your Outdoor Fall Ambiance with Permanent Outdoor Light Do you want your house to feel special this fall season? You can enhance your home’s exterior with Govee Permanent Outdoor Lights. These energy-efficient LEDs are designed to highlight architectural features and add a cozy touch to any setting. They offer warm shades such as amber, gold, and burnt orange to create a festive seasonal glow. You can also use the app to easily craft lighting scenes for Halloween, Thanksgiving, and crisp autumn evenings. 10. Porch String Lights with Fall Garland Drape porches, railings, or other fences with garland streaked with lights. Select versions that include maple leaves or pumpkins to answer a festive subject. This makes the combination friendly to guests and cute on the curb. image from www.aliexpress.com 11. Pathway Lighting with Pumpkins LED candles are pumpkin-carved and used as utility lights. You may as well use solar lanterns or set up low recessed path lights in the pathway. This offers safety and a fall ambiance in the fall evenings. Adding a few scattered mini pumpkins beside the lights enhances the seasonal charm even more. 12. Patio Ceiling Glow String up the patio light hanging tassels across the patio roof or pergola. Warm white bulbs give ambiance to eating outside and bon fire nights. To have a rustic look, use Edison bulbs or amber colored LEDs. image from image from www.gentrilee.com 13. Tree Wrapping Lights Wind strings of fairy lights or orange LED lights through the backyard trees. This does not only show off the autumn foliage, but it can also add festivity to your landscape. Combine autumn tree lights to great effect and to light up fall décor. A gentle twinkle mode will make the trees feel alive on crisp fall nights. image from www.loveourreallife.com 14. Outdoor Lantern Clusters Put lanterns with flameless candles on the porch steps or in the corners of your gardens. Lanterns made of metal or wood in warm colors will give rustic chic. They bring the layer of security as well as a sense of a cozy atmosphere during fall evenings. image from clickalights.com 15. Fence and Deck Glow Install recessed LED lights on the side of fences or on decks. They add decoration to the fall season by using fall garland lights. The layering process means that outdoor spaces are lit up and festive. Pair them with lanterns or string lights above to create a complete cozy scene. 17. Harvest-Themed Outdoor Displays Use bales of hay, pumpkins, and fall garlands of lights on your front porch. Add fairy lights that do not require electrical power, as this was used to highlight the display at night. This makes an autumn spectacle of your home exterior. Incorporating rustic crates filled with gourds and wrapping corn stalks with soft amber lights can further amplify the seasonal charm and create a welcoming harvest-inspired entryway. image from allthefallthings.com 16. Fire Pit Lighting During fall gatherings, take recessed lights under the sitting or strung lights above the fire pit location. It adds visibility and maintains the mood to be warm and cozy. Combine lanterns for the whole set to light up fall decor. Part 3. Smart Lighting & Automation Trends for Fall The seasonal decorating is being redefined by smart lighting. Setting fall string lights, changing colors, and creating schedules with apps and voice control allow you to have greater convenience. Smart LED Bulb Lights and Smart String Lights by Govee can add the necessary autumn mood, as they have variable brightness and color modes options, as well as the music sync option available with their use during gatherings. This makes your home feel cozy, festive, and energy-efficient throughout the entire fall season. FAQs about Fall Lighting What month should you start decorating for fall? It usually starts with most individuals decorating in late September because the weather gets cooler and the pumpkins are available in the stores. What are the best trimlight colors for fall? Warm colors such as amber and orange are best on trim lights. Combining red will also give an autumn look. You can also mix in soft yellow tones for a golden glow that enhances the cozy fall ambiance. How can I make my house look autumnal? Adding warm fall string lights, autumn tree lights, comfy textiles, and natural pieces like pumpkins and garlands creates the perfect fall decor overhaul. Conclusion Adding indoor fall string lights here and outdoor autumn tree lights there lighting can make all the difference in how to create an inviting autumn atmosphere. Depending on whether you want rustic lanterns, clever automation, or fanciful garland lights, the right installation will make your house look welcoming the entire season.
9/1/2025
November 1, 2026: We added a pre-install Wi-Fi checklist for outdoor light controllers, covering combined 2.4/5 GHz networks, homes with dozens of smart devices, mesh coverage near the roofline, and the order for pairing several controllers. Govee Permanent Outdoor Light is a smart way to make the outside of your home more enjoyable, in a colorful and all-year-round way. This article provides a step-by-step guide on how to install permanent Christmas lights, making the process easy, professional, and suitable for your outdoor environment. Part 1. Materials Needed for Permanent Christmas Light Installation Before setting up the Govee Permanent Outdoor Lights, you will need the following: a ladder, a drill, a measuring tape, a pencil, mounting clips or screws, and, of course, the Govee light kit. The availability of such tools ensures the convenient and rapid installation. How to pick the best permanent christmas lights >> Part 2. How to Install Govee Permanent Outdoor Lights in 6 Steps Pre‑Installation Preparation Start by selecting the locations you want to illuminate, such as rooflines, patios, or fences. Ensure the surface is clean to ensure a safe stick or placement. Select the required length and have your power source ready. Then, recheck the layout one more time to ensure it is balanced and accessible, and place the real light there. If your home already runs a lot of smart devices, go through the pre-install Wi-Fi checklist in Part 3 before you mount anything. Here is the installation video for Govee Permanent Outdoor Lights Pro (H706A/B/C) : For installation videos of other models, please check out the YouTube videos below > Govee Permanent Outdoor Lights 2 Pro (H3A51/3) Govee Permanent Outdoor Lights Prism (H707B/C) Here is a step-by-step guide to help you install Govee permanent lights perfectly on your own. Step1: After opening the box, the first thing to do is test the lights. To do so, connect the strings to examine whether they light up, and then connect them to a power source. Step 2. After cleaning the wall with a cloth or tissue, please place the string lights 3 to 8 cm from the wall surface. (Most people choose a distance of 5–10 cm.) Step 3: Hold the light firmly on the surface for at least five seconds after tearing the VHB gum from the rear of the light. To hold each string light in place, fasten it with four screw clips. Step 4: Connect two string lights via water proof connectors and screw in the cap. Step 5: If you want to install the H706C. 200ft/12 strings of lights, connect the LED driver module to the end of the fifth string light, followed by the remaining seven string lights. To ensure every string light functions correctly, plug it into the power source now. Step 6: Screw the last string’s light section waterproof connecting cap firmly in place. Guide: How to Cut, Splice or Extend Govee Permanent Outdoor Lights? Part 3. Smart Setup & Configuration for Permanent Lights Watch the user video for unboxing and installing the Govee Permanent Lights: After you have physically set up your Govee Permanent Outdoor Lights, you must then perform some technical tasks with the help of your smartphone. 1. Connecting Lights to the Govee Home app Launch the Govee Home app and tap the plus sign to add a button, then select your type of light (e.g., H706C for Govee Permanent Outdoor Lights Pro). Turn on Bluetooth on your phone. The app will automatically detect the lights, confirm, and pair. Once it is connected, you can then connect the device to a 2.4 GHz Wi-Fi network (not 5 GHz). 2. Adjusting Some Settings After connecting, you'll find a wide selection of preset scenes to choose from, such as holiday lights ready for a party or dim daytime lights. You can also program light schedules to turn on or off at sunset, sunrise, or at a specific time of day. Comes with Alexa or Google Assistant, enabling voice commands. Simply tell Alexa to turn on the outside lights, or instruct Google to set the patio lights to blue. 3. Music Sync One can also sync the lights to music using the built-in mic of the Govee or the mic on your phone, making these lights particularly useful when you want to party or relax. Launch the app and turn on Music Mode. Listen to your lights pulse to the beat of your favorite song. 4. Outdoor Wi‑Fi Connectivity Tips Ensure that your router is positioned within 30 feet of the control box. Do not wall it up in thick walls or metal siding. The outdoor signals can be amplified with the assistance of a Wi-Fi range extender. Update the app's firmware to enhance its efficiency. All this is in place, and you have an intelligent and flexible outdoor light system to be proud of. 5. Pre-Install Wi-Fi Checklist for Outdoor Light Controllers Before installing outdoor Christmas light controllers, verify your 2.4 GHz band, network name, encryption, room for more devices, and outdoor power supply. Govee Permanent Outdoor Lights Pro is better suited for homes that already run dozens of smart devices, since it connects via 2.4 GHz Wi-Fi plus Bluetooth, works with Matter, Alexa, and Google Assistant, and comes in 100 ft, 150 ft, and 200 ft kits. Review the checklist below first. Run these checks in order before you climb the ladder. Check What to look for If it fails 1. 2.4 GHz band 2.4 GHz is turned on in your router or mesh app. Govee Permanent Outdoor Lights Pro uses 2.4 GHz Wi-Fi plus Bluetooth, not 5 GHz Turn the 2.4 GHz band back on; keep 5 GHz on for phones and laptops 2. One combined network name Your router shows one combined SSID (your Wi-Fi network name) for 2.4 and 5 GHz, often called band steering (a router feature that moves devices between 2.4 GHz and 5 GHz automatically) or Smart Connect If the app can't finish setup, pause band steering, pair, then turn it back on. Or give 2.4 GHz its own network name for the lights and keep that name, since the lights stay on the network name they were paired with 3. Security mode WPA2-Personal (AES) or WPA2/WPA3 mixed mode Avoid WPA3-only during setup; never turn security off to pair a device 4. Room for more devices Your router or mesh app has headroom in its device list and IP address (DHCP) pool Remove devices you no longer use, or widen the DHCP range 5. Signal at the control box A steady 2.4 GHz signal at the exact spot under the eaves, tested with doors closed Move a mesh node closer while keeping a strong link to the main router, use a wired connection for that node, or add an access point 6. Same network, no isolation Your phone and the lights are on the same network, not a guest network that blocks local devices Move the lights off the guest network, or allow devices on it to talk to each other 7. Outdoor power A GFCI (ground-fault circuit interrupter, an outlet that cuts power when it detects a fault) -protected outlet and a control box rated for outdoor use. Govee Permanent Outdoor Lights Pro has an IP65 control box, and its power adapter is for indoor use only Plug the adapter into an indoor outlet, such as one in the garage, and keep outdoor connections covered and off the ground 8. Pairing plan One controller at a time, each named by location (for example, Front Roofline) Restart your router once and confirm the first set reconnects before you pair the next How to Handle One Combined 2.4/5 GHz Network If your router puts 2.4 GHz and 5 GHz on one combined SSID, band steering can get in the way when you pair 2.4 GHz smart home devices, so check your WPA2/WPA3 setting and try the controller setup once before you change anything. Govee Permanent Outdoor Lights Pro uses 2.4 GHz Wi-Fi and Bluetooth. The app uses Bluetooth to find the control box first, and then connects to Wi‑Fi. For the steps, see Connecting Lights to the Govee Home app above. If the lights will not pair, follow these steps: 1. Make sure your phone is connected to your home network and your VPN is off. 2. In your router app, pause band steering for a few minutes. Once the lights are paired, turn it back on. 3. Give the 2.4 GHz band a separate network name just for the lights and keep that name permanently, because if you change it later, the control box will disconnect. 4. Change only one router setting at a time so you know what worked. 5. If you already set the lights up through Matter, do not use the Govee Home app to switch networks, or the Matter connection will break, and you will have to reset and configure everything. What to Check When You Already Have Dozens of Smart Devices Having plenty of smart gear around the house does not mean you have to buy a new router. Start by checking how many devices actually use Wi-Fi. Anything running on Zigbee, Thread, or Bluetooth does not take up your router's wireless slots. Then open your router or mesh app to see if you still have room in your connected device list and your DHCP address pool. In your 2.4 GHz settings, set the channel width to 20 MHz and pick the clearest channel out of channels 1, 6, or 11. Make sure your network uses at least WPA2 encryption, such as WPA2-Personal (AES) or WPA2/WPA3 mixed mode. Never turn encryption off just to get a device connected. Putting your gear on a separate IoT network is optional. Avoid standard guest networks because they usually block local communication between the phone and lights. Keep in mind that every light controller you add counts as another 2.4 GHz device on your network. Mesh Wi-Fi Coverage Near the Roofline Go to the exact spot where you want to install the control box, and measure the signal strength. Test right there, not by a window or upstairs. The Wi-Fi bars on your phone only give you a rough idea. Check the Wi-Fi signal strength (RSSI) your mesh app reports for the outdoor controller spot on the 2.4 GHz band. RSSI is shown in dBm, and a number closer to zero means a stronger signal. If the signal out there is weak, try the following fixes: 1. Check your mesh app and see which node covers the side of the house where the control box will go. Make sure it has a strong connection to your main router. 2. Move that node closer to that side, but keep it somewhere it can have a stable connection to the main router and keep it out of dead spots. 3. If possible, connect that node using an Ethernet cable for a wired backhaul. 4. If coverage still doesn't improve, install an outdoor access point, install an outdoor access point. Materials like brick, metal siding, aluminum gutters, and foil insulation can affect the signal and Wi-Fi range. It’s better to keep your windows and exterior doors shut while testing. For electrical safety, plug outdoor holiday lights into a GFCI outlet and use only weatherproof extension cords rated for outdoor use. The cords you are using should be certified for outdoor use, and if your outdoor outlet lacks built-in protection, pick up portable outdoor GFCIs. Keep in mind that an outdoor-rated light does not mean its power supply is also outdoor-rated. Govee Permanent Outdoor Lights Pro comes with an IP65 control box, but its adapter is for indoor use only, so it must be plugged into an indoor outlet. If your only outlet by the roofline sits outside, Govee Permanent Outdoor Lights 2 Pro (control box and power adapter IP67) or Govee Permanent Outdoor Lights Prism (power adapter marked Outdoor Use) fits that setup. Pairing Order for 1–10 Light Controllers Adding up to ten controllers will not overload a normal home network. Most problems come from a weak signal or a pairing step that went wrong. It’s better to set up controllers one by one. 1. Matter setup first: If you want to use Matter, pair the lights in your Matter app within 15 minutes of plugging them in, before opening the Govee Home app. As noted in the Govee Matter FAQ, Govee runs Matter over Wi-Fi, so your phone and Matter hub must be connected to a 2.4 GHz network with IPv6 turned on in your router. 2. Bench test: Plug the first set in near your router to test colors, dimming, and a basic automation like a sunset schedule. 3. Name by location: Give each controller a clear name, like Front Roofline or Garage Eaves. 4. Reboot check: Restart your router once to make sure the first controller reconnects on its own before you start on the next one. 5. Voice check: Once everything is up, connect your lights to Alexa or Google Assistant and run a quick voice test. If you have a wide roofline, a single Pro kit can be cut and extended up to 200 ft in total. If you go beyond 150 ft, you will need a Govee driver module, which comes included in the 200 ft box. Wi-Fi Light Controllers vs Smart Plugs vs Hub-Based Controllers Knowing the difference between control setups will save you headaches when planning outdoor lighting. Wi‑fi light controllers: App-controlled permanent lights with their own control boxes let you pick custom colors, scenes, and set schedules in the app, but each controller takes up a 2.4 GHz client spot and needs a dependable signal out at the eaves. Standard string lights + Wi-Fi smart plug: Putting standard string lights on an outdoor Wi-Fi smart plug lets you turn power on and off on a timer, but you cannot change colors or run animations, and the plug still uses a 2.4 GHz slot. Hub-based controllers (Zigbee or Thread): Hub-based controllers using Zigbee or Thread do not take up a Wi-Fi client slot on your router, but you need a compatible hub indoors, and its wireless range has to reach the eaves. The Matter standard helps different brands work together under one roof. Because Govee uses Wi-Fi for Matter, these lights still connect over your 2.4 GHz band. If your house already has a lot of smart devices and you want color-changing lights, go through the checklist above before picking Wi-Fi lights. Why Govee Permanent Outdoor Lights Pro Fits a Busy Smart Home Govee Permanent Outdoor Lights Pro is better suited for homeowners who already run dozens of smart devices and want 100 ft, 150 ft, or 200 ft of roofline lights that join their Matter, Alexa, or Google Assistant setup. Pros: Uses 2.4 GHz Wi-Fi plus Bluetooth for setup and works with Matter, Alexa, and Google Assistant, so it joins your existing smart home. You can pick from 100 ft, 150 ft, or 200 ft kits. You can cut and extend a run up to 200 ft, and the 200 ft kit comes with the driver module you need once you pass 150 ft. The 200 ft setup has 120 lights putting out 50 lumens each, with warm to cool white (2,700K to 6,500K) for daily and security lighting, and it pairs with the Govee Outdoor Motion Sensor. Cons: It connects only to 2.4 GHz Wi-Fi, not 5 GHz, so each controller adds to your 2.4 GHz count, and you need Bluetooth on to set it up. The lights handle temperatures from -4°F to 140°F and the control box is IP65 rated, but the power adapter is indoor-only, meaning it needs an indoor outlet. Also, the upgraded black H706C does not work with the older H706C or with current voltage booster modules and control boxes. Pricing is $439.99 for 100 ft, $599.99 for 150 ft, and $759.99 for 200 ft as of November 1. Measure your eaves before you choose a length. Before climbing the ladder, run through the checklist above. Mount the control box under the eaves, and plug the power adapter into an indoor outlet. See lengths and housing colors on the Govee Permanent Outdoor Lights Pro product page. Always follow the product manual and local electrical codes. For hardwired installations, hire a licensed electrician. Part 4. Govee Permanent Outdoor Lights Installation Tips and Troubleshooting Guide Here are some Govee’s permanent outdoor lights installation robust tips and fixes to overcome some common issues : Installation Tips 1. Begin at the source of power You should always start your installations nearest to your power point and then proceed towards the outer side. This decreases slack on the cables and maintains continuity in the strip. 2. Apply Adhesive and Screws The strips may be supplied with adhesive pads, which are very strong; however, it is also recommended to use the screws and clips provided, particularly where the strips are exposed to wind, moisture, or heat. 3. Sharp Bends Always avoid making the light strips make sharp turns or travel around rough edges. This can break the wiring and cause performance issues. 4. Symmetry Level Place both pucks horizontally with the aid of a level tool. The crooked lines may be visible at night, which reduces the professional appearance. Troubleshooting Common Problems 1. LEDs not Lighting up Check all connectors to ensure they are securely fastened and sealed with waterproof caps. A loose or misplaced pin can break the circuit. 2. Wi-Fi not Connecting Ensure you are using a 2.4 GHz network. Reset your router or bring it near. If you're experiencing a weak signal, consider using a Wi-Fi extender. 3. Lights not Connecting to the App During the initial pairing, ensure that Bluetooth is activated. Reset the application or upgrade it when the command is slow. 4. Adhesive Failure Clean the surfaces well with alcohol, then apply the adhesive. When strips fall, adhesive pads should be replaced and screws should be used as backup. These tips should help keep your Govee smart lights bright, networked, and securely fastened over the years. Part 5. FAQs about Permanent Outdoor Lights Installation Q1. How to Connect to Govee Permanent Outdoor Lights? You need to install the Govee Home app on your phone. Switch on its Bluetooth and connect the control box. Select the type of Govee light that you have, and tap the + button in the app to add a new device. After connecting to Bluetooth, follow the prompt to connect to a 2.4GHz Wi-Fi network. Q2. How Long Does It Take to Install Govee Permanent Outdoor Lights? Installation on most homes takes between 2 and 4 hours, depending on the length of the lights and the surface to be mounted. The layout may be planned, and the elements can be tested, which will significantly simplify the entire process. Q3. Do You Need WiFi for Govee Permanent Outdoor Lights? Yes, it must have Wi-Fi to access remotely, use voice commands, and utilize innovative features such as scheduling and scene configuration. It is essential to ensure that you are using a 2.4GHz network, as 5GHz is not supported. Q4. Is It Easy to Install Govee Permanent Outdoor Lights? Yes--it is easy to install. Govee supplies elaborate guides, adhesive clips, and waterproof adapters. Most users can complete the task without calling a professional, as it requires only simple tools, such as a drill, ladder, and measuring tape. Q5. How to Secure Govee Outdoor Lights? Fix the lights with the mounting clips and screws provided. Begin on the control box and insert clips every 12-18 inches to provide support. To further make it more durable, place waterproof adhesive pads (supplied) and screw the clips into position. Q6. How to Reset Govee Permanent Outdoor Lights? Hold the button on the control box with your fingers until the light strip flashes or the indicator changes, approximately 10 seconds. Alternatively, a soft reset can be performed by powering off the device and then powering it back on within 10 seconds. Q7. How Much Does It Cost to Install Permanent Christmas Lights? If you need to hire someone to help you install them, the average installation cost for permanent Christmas lights is around $300 to $500. Q8. How Long Do Permanent Christmas Lights Last High-quality lights, such as those sold by Govee, are durable and long-lasting. Given that they are installed and properly cared for, they may last up to 50,000 hours, or over 10 years of everyday use. They are designed to be weatherproof and therefore last throughout the year. Explore Govee Christmas Lights >> Q9. Where to Install Govee Permanent Outdoor Lights Fix them along roof lines, soffits, fences, decks, and outdoor trims, anywhere you desire light. They should be best placed under eaves, 5-10 cm away from the wall, so that they can create a balanced wash effect. Ensure you are near a power source and have a strong Wi-Fi signal. Q10. Can I install Permanent Christmas Lights Myself? Yes, Govee Permanent outdoor lights come in a DIY type. Most homeowners can install them with simple tools, such as a drill, ladder, and measuring tape, since it does not require the use of professional assistance. You only have to read the instructions, make connections, and observe safety measures, particularly when climbing ladders or roof tops. Q11. What Is the Best Distance from the Wall for Installing Permanent Outdoor Lights? Based on user reviews on Reddit, Govee lights should be positioned approximately 5-10 cm away from the wall to create the most attractive look. It provides a clean, scalloped pattern of lighting and the proper level of illumination, without excessive glare, thereby making your installation both fashionable and efficient. Conclusion Govee Permanent Outdoor Lights are an intelligent, fashionable upgrade, combining utility, design, and innovative technology. A professional look can be easily achieved with the right tools, precise planning, and the integration of apps. Are you going to renovate the exterior of your house? Experience Govee permanent lights today and get the best of brilliance all year round at your fingertips.
11/1/2026
A bright fence, however, does more than just illuminate your yard. It improves curb appeal, heightens security, and establishes the atmosphere during outdoor events. Reading the following 21 ingenious fence lighting ideas should help you create a festive Christmas-like setting or a modern sleek space and turn your backyard into a masterfully lit garden. 1. Modern Fence Lighting Ideas Fence lighting today is a minimal and clean line. Install smooth floor-to-ceiling LED sconces, or install strip lights incorporated into the slats of a horizontal structure. It should be cool white or dimmable to blend with the modern building of your house. Motion sensor smart LED strips are also a step up to your arrangement. 2. Christmas Lights on Fence Ideas Warm up your fence in some colorful or warm white Christmas lights and share the Christmas spirit. Tinker fancy lines such as zigzags or edging on every panel. To get a dynamic and convenient installation, you can resort to Govee LED Net Lights. These set net lights can be hung with ease on fences, shrubs, or hedges and require less time without compromising the breathtaking effects they produce. Are you ready to impress your holiday visitors? 3. String Lights on Fence Ideas You can add vintage appeal to any fence by inserting string lights throughout it or weaving them across the top. Choose globe bulbs or Edison-style lights to get a cozy atmosphere. Choose Govee Outdoor String Lights 2 to be more durable and have convenient smart control using your phone app. It is weatherproof, so you can use it anytime, anywhere. 4. Wood Fence Lighting Ideas Wood fences have a natural warm touch, and your lighting can increase this. Experiment with rustic lantern brackets between posts or homemade mason jar lighting bracketed by wrought iron. Hang solar tiki torches to make a theme party or wire cage lanterns with an old industrial look. To achieve a functional approach, downward-facing LED sconces just above eye level will show off the grain and age of the wood in a very pleasing manner. 5. Solar Fence Lighting Ideas Reduce consumption of electricity and at the same time create ambiance by the use of solar lights in the fences. These bulbs are loaded during the day and automatically turn on your area at dusk. Put solar caps on every post to create an even distribution or use hanging lanterns as both a light source and a decor. They are especially effective in areas without wiring access. 6. Pool Fence Lighting Ideas Not only can a well-illuminated pool fence be quite beautiful, but it also plays a safety role. Install waterproof LED strips on the wall to illuminate the perimeter of the fences with no glare. Install changing color string lights to be used during pool parties and at night. 7. Motion Sensor Fence Lights Increase the security in the house with motion-activated floodlights on the fence. These spotlights are non-obtrusive until they sense motion when they light up to full strength--scaring off intruders without blinding you in the process. Adjustable warmth and range options make you balance safety and warmth. Combine with landscape lights to provide a full perimeter by covering access points and pathways. 8. Lantern-Style Fence Lights Create an old-fashioned, romantic look through lantern-shaped lighting. Drape shepherd hooks with mount antique-look lanterns. In case of flexible location, buy battery-powered lanterns having in-built timers or utilize solar power. Flameless candles that mimic a natural flicker add to the ambiance without fire risk. 9. LED Strip Fence Lighting Outdoor LED strip lights are flexible and colorful with no limit to the number of light arrangements. Products them along the top edge to provide a continuity of light or each run them vertically on fence panels to provide a column effect. The RGB models are customized in full color whereas the warm whites can be incorporated to give a vintage feel. Apply waterproof types that possess high adhesive back so that it lasts. 10. Bamboo Torch Fence Lights https://thediyplaybook.com/our-backyard-at-night/ Give a tropical flair to your fence with bamboo torches placed along your fence. They may be conventional oil flame torches or solar-based ones that use LED flames. Frame an outdoor bar room or patio with them or distribute them evenly around your yard to make a theme. 11. Colored Uplighting for Mood use ground-based uplights to set the tone on your fence in different colorings. With colored floor lights, you can set the colors on demand, such as relaxing blues to party red or green. Light uplights at varying degrees to make dramatic shadows or slopes. And you may even set up timers or music to sync and automatically set the mood. 12. Curtain String Lights To create a magical, fairytale-like atmosphere, put curtain string lights that hang down the fence. These are designed to work well on privacy fences and they act as both lights and ornamentation. Have a nice warm white color or multicolor to get a holiday impression. 13. Artistic Shadow-Casting Lights Choose those fixtures that will be more than just radiating, they will bring art. Cut out decorative lanterns or sconces to project elaborate designs on your fence and other adjacent surfaces. This gives an otherwise plain surface motion, depth, and texture. Install these lights closely over plants or textured walls to add shadows. 14. Fence-Mounted Pendant Lights Identify the areas--such as reading or dining nooks--by installing a pendant light that hangs on longer arms of fences or overhangs. Use outdoor-rated, weatherproof fixtures that can be made of metal rattan or thick glass. Stack several pendants together to create a dramatic impression or just one eye-catching pendant. 15. Hanging Jar Lights They make fences appear fanciful with Mason jars containing an array of small lights. Hang them on each panel or post by twine, chains, or S-hooks. It is possible to use jars with fairy lights, pebbles, sand, or seasonal decorations to fit the theme. Solar lids are offered to convert this system into a full wire-free. 16. Artistic Fence Lighting Patterns Open yourself by using shapes and patterns to create with your lights. Consider flexible rope lights to draw stars, hearts, or even garden-themed decorations such as vines and flowers. Make temporary decorations based on holidays- pumpkins, snowflakes, or fireworks. 17. Candle-Style Fence Lights LED candle lights housed in outdoor wall sconces evoke a romantic, intimate atmosphere. They are perfect for evening dinners or sitting on the patio. Select non-opening flame effects but obtain realistic flames using flickering LEDs. Place them on brick, wood, or stone fences to get a posh look. These lights also go magnificently with metal scrollwork or vintage-style accents to finish the look. 18. Recessed Fence Lighting Design a high-end and sophisticated feel, and put recessed lights directly into fence posts. The lights are low-profile and have a remote glow, good in a modern home, or a minimalist yard. Warm tones can be used to diminish a harsh fence or cool white to make it look like a gallery. Recessed light may also be used microphoned to sensors. 19. Fence Post Cap Lights Fence post cap lights provide an aesthetic symmetrical form of perimeter lighting. These are placed on top of the fence posts and can be of solar and wired types. And some have dusk-to-dawn sensors, color-shifting, or dimming built-in. Have matching caps on the whole fence to get a clean finish. 20. Privacy Fence Lighting Ideas There is hidden lighting that can be added to make high privacy fences glow and elegant. From the bottom, soft uplighting will create a dramatic silhouette on your fence, which is excellent for showing off wood, stone, and vinyl textures. LED strips set right below the top cap would be able to provide a smooth line of light across your backyard. Smart lighting systems enable you to set times of night before a particular color or intensity switches on or off. 21. Chain Link Fence Lighting Ideas Chain link fences provide a lot of creative flexibility than your mind can imagine. To connect the LED rope lights, use zip ties in zig zags or outlines. Fairy lights made with batteries can be strung through the metal mesh to reduce the industrial appearance. To have brighter touch, solar string lamps have larger bulbs that make it easier to see. Place artificial foliage or garden panels behind the lamps to create a better appeal. Conclusion An effective and quick solution to light up your outdoor space is the use of fence lighting. Whether you're decking it out for the holidays or simply adding safety and style, Govee outdoor lights are perfect for DIY fence lighting. Mix and match styles to create a look that’s uniquely yours, and enjoy your glowing backyard sanctuary year-round.
7/3/2025
Replacing a pool light is a DIY job that almost anyone can do. You don’t need to drain the pool or use heavy equipment. It’s a simple task that can be done within an hour or earlier, depending on your speed.Let’s look at the step-by-step process of replacing a pool light. You can get it replaced in 7 simple steps. Part 1. Safety Preparation Before Changing Pool Light Before you start the job, make sure to cut off the electricity. For the electrical panel or circuit breaker box, turn off the pool light circuit breaker. After switching it off, try turning on the lights. They shouldn’t turn on, and if they do, you have turned off the wrong circuit breaker. You can also test the supply through a non-contact voltage tester. Part 2. Tools And Materials For Pool Light Replacement You need the basic tools to replace a pool light. These tools are commonly available in every home. Here is a list. Philips screw driver Adjustable spanner Pliers (might be needed to hold the bolt) You need to buy a few things to replace the light bulb. LED pool light bulb according to the fixture Gasket Silicon sealant Part 3. How To Replace Pool Light In 7 Steps Before we begin, keep in mind that you don’t need to drain the pool. You can replace the light even when the light fixture is submerged. Moreover, you don’t need to go into the pool. Just stay on the ground above the light. Then, you only need to dip your hands in water to take out the light fixture. Let’s see the detailed steps. Step 1: Unscrew the Light After turning off the power, you are ready to unscrew the light fixture. For this, you need a Phillips screwdriver. It is usually secured with one screw at the top. Unscrew it. Step 2: Take Out the Light Once you unscrew the light, you can take it out of the water. Usually, these light fixtures have a long wire, which is enough to take the fixture outside the pool. Using your hands, wiggle the light a bit. It should automatically pop out, and then you can take it out of the water and put it on the ground. Step 3: Remove the Glass Lens Now, you need to remove the glass lens on the front to access the bulb or light inside. It is secured using a compression ring. You can loosen the nut using a screwdriver, adjustable spanner, or pliers, depending on the type of fixture. You don’t need to remove the bolt. Just loosen it, and it will loosen the compression ring. Once loosened, remove the ring from the hooks of the metal ring holding the lens. Remove the ring so you can access the lens. The lens will have a gasket around it. Use a screwdriver to lift up the lens. Do it carefully as it is made of glass. Remove it and keep it aside. Step 4: Remove the Light Bulb You will see the bulb after removing the lens. Unscrew the bulb or light from the holder. Now, you can replace it with a new bulb. LED bulbs are recommended. Make sure to get the bulb with the same end type or base. Fix the new LED bulb and secure it on the holder. Step 5: Replace the Gasket It is better to replace the gasket every time you replace the bulb. It ensures no water leakage. You can get the gasket easily. Remove the old gasket from the lens. Apply gentle pressure with your hands and remove it. Clean the edges of the lens and place the new gasket carefully. The lens should sit in the groove perfectly. Step 6: Secure the Glass Lens It’s better to use silicone sealant on the sides of the fixture where the gasket sits. It is not necessary, but doing it ensures no leakage. After applying the sealant, put the lens on the fixture. Now, place the metal ring over it. Make sure you alight the screw holes properly. Put the compression ring back on the hooks of the metal ring. Once everything is aligned, tighten the nut. It will grip the hooks and secure the ring on the fixture. It also seals everything to prevent water from getting into it. Step 7: Install the Fixture Everything is ready now. You just need to put the fixture back in its place. Align the fixture on its housing. Finally, tighten the screw. It’s time to test the light. Turn on the circuit breaker, and then turn on the button. You’ve successfully replaced a pool light on your own. Part 4. Common Swimming Pool Light Replacement Problems & Fixes 🛠️Lights Not Working: If none of the lights are working, the problem could be with the circuit breaker. Turn it on, and if it trips again, it’s an indication of a fault. Contact a professional to identify the reason and fix it. 🛠️Loose Connection: Often lights do not work due to a loose connection. In this case, you need to tighten the connection to resolve the issue. Take out the fixture and install the light again. 🛠️Faulty Switch: If the light is not working after replacement, check the switch. It could be faulty. In this case, you need to replace the switch. 🛠️Breaker Tripping: If the breaker trips instantly after turning it on, there could be a short circuit. The breaker could also be faulty. In this case, contact a professional to resolve the issue. 🛠️Water Leakage: If the water is getting into the light, replace the gasket. Along with that, use a silicone sealant to fill tiny gaps. 🛠️Light Flickering: If the light is new, the flicker usually happens because of water. It requires gasket replacement and silicone sealant. Otherwise, the bulb will stop working. Part 5. Color Changing Pool Light Recommendation Want to make your pool party unforgettable? Try Govee’s Outdoor RGBIC Neon Strip Lights! With an IP67 waterproof rating and customizable color zones, they wrap effortlessly around your pool’s edge. Just sync them to your favorite tunes via the app and watch 16 million colors dance across the water—pure magic! Are you Looking to brighten up your pool area? Govee Outdoor Lamp Post Lights are perfect! They’re weather‑proof and energy‑efficient, mounting easily along walkways or deck edges. With adjustable brightness and smart app controls, you can set the mood just right—whether it’s a relaxing evening swim or a fun, festive pool party. FAQs About Changing Out Pool Light 🔵How to change a pool light without draining the water? You don’t need to drain water to change a pool light. Dip your hands in water and unscrew the fixture. Take it out of the water and replace the bulb. Follow the detailed steps we have discussed. 🔵Do you need an electrician to change a pool light? No, it’s a DIY task. You can do it on your own with basic DIY knowledge and simple tools. But if there is any fault or you are not confident, it is better to hire an electrician to get the job done. 🔵How much to replace a pool light? Licensed electricians take $50 to $150 per hour, depending on the job. But if you do it on your own, you only need to spend on the LED bulb. Conclusion You can replace a pool light on your own. You only need a screwdriver and an adjustable spanner. We have shared 7 simple steps you can follow without any hassle. Just make sure to turn off the circuit breaker and follow the steps carefully. If there is any fault or serious issue, contact a licensed electrician.
7/2/2025

